Following go-live and communication with a number of connections, I was asked about Power-Pages and what would Power Pages actually bring for a client like Solestyles Boutique. Whilst this has not been deployed to Solestyles boutique, I have permission to use the information discussed in the previous 6 posts as a factor in helping readers understand Power Pages in a more experienced (real world based) and more knowledgeable scenario.
Thank you Solestyles Boutique.
Introduction – Why Consider Power Pages?
Following the deep dive into Solestyles Boutique’s licensing TCO in Post 6, a striking insight emerged:
By shifting 2080 customer seats from Premium Per App licences (£9.20/seat/month) to a Power Pages portal, we could slash that line item by over 60 %.
That equates to potential savings upwards of £10 000 per month, without compromising the core ordering experience.
Note: Solestyles’ current solution wasn’t originally designed or developed for Power Pages. However, after reviewing the total cost of ownership, the management team are now evaluating Power Pages as a viable alternative for customer-facing ordering in the future.
But what exactly is Power Pages, and why might it be the right fit for high-volume, customer-facing scenarios like Solestyles’ ordering portal? In this post I explore:
- What are Power Pages? Microsoft’s low-code web-portal platform built on Dataverse.
- How it differs from Canvas Apps and Model-Driven Apps in both capabilities and licensing.
- The key benefits it brings; scalable external authentication, built-in content delivery, responsive design and more.
- An alternative cost model; subscription and pay-as-you-go meters that align expenses with actual usage.
- Trade-offs to consider – offline support not available, UI customisation limits and portal throughput.
For anyone looking to serve thousands of customers through a branded, data-driven website while keeping licence spend predictable; Power Pages is a compelling option. Let’s start by unpacking what Power Pages really is, and how it can power the next generation of Solestyles’ online storefronts.
What Is Power Pages?
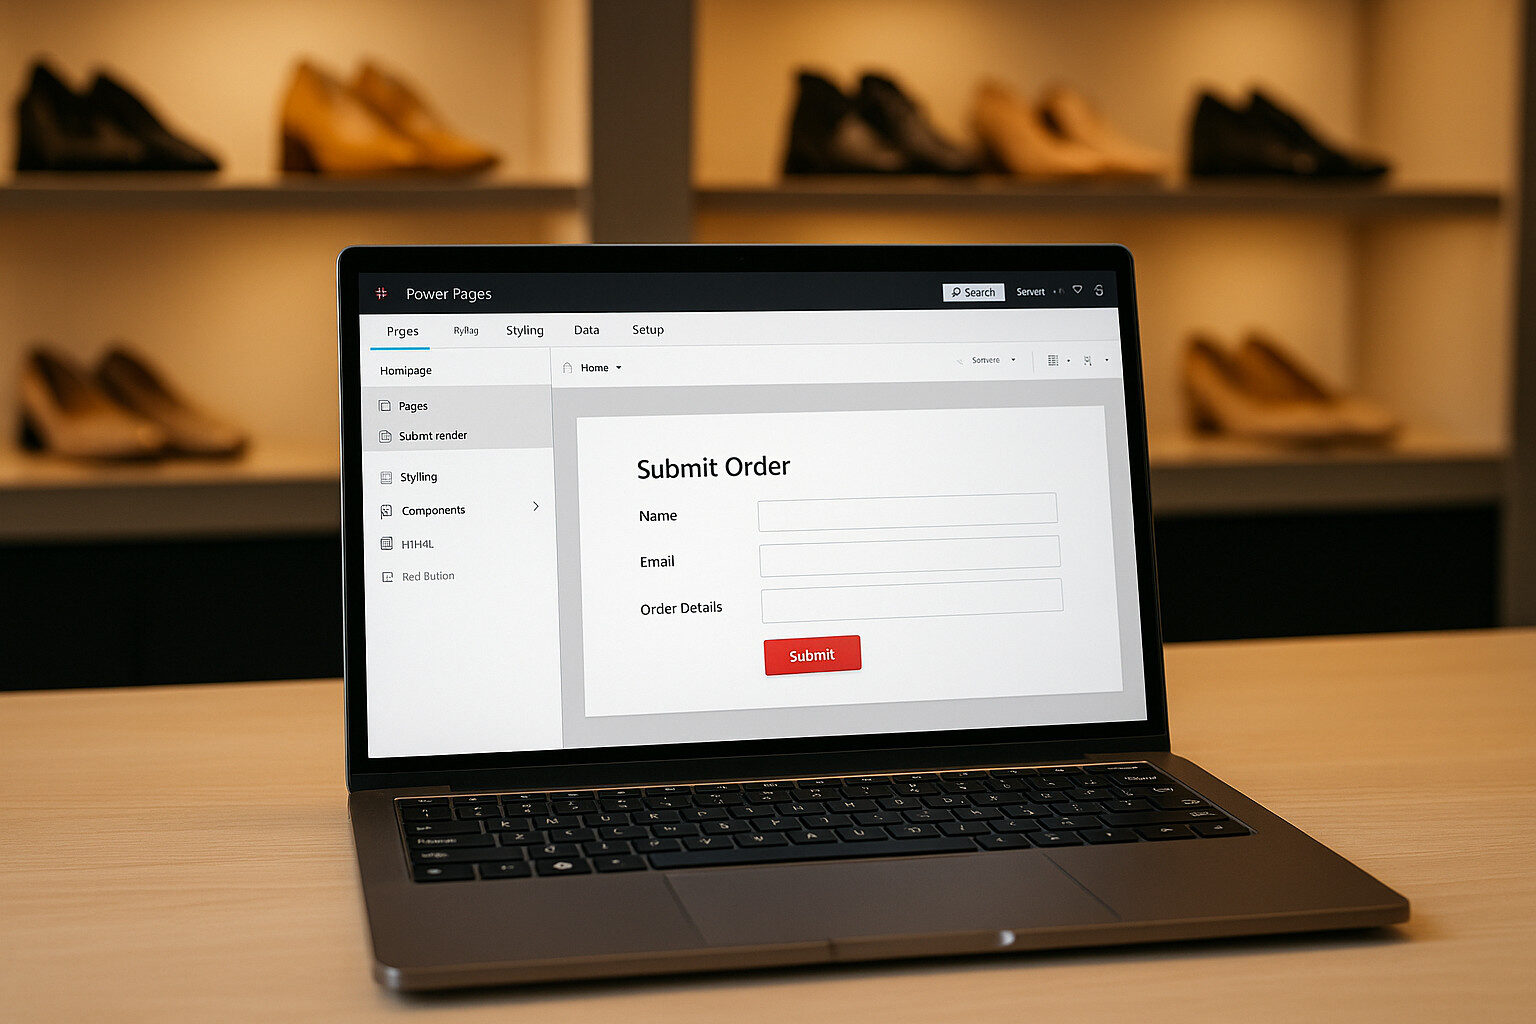 Microsoft Power Pages is the evolution of Power Apps Portals; a secure, enterprise-grade, low-code SaaS platform for building data-driven websites on top of Dataverse. Released as a standalone product in 2023, Power Pages combines the familiarity of Power Platform with new tooling and capacity-based licensing tailored for external (anonymous or authenticated) users.
The Five Design Studio Workspaces
Power Pages’ browser-based Design Studio organises all portal development into five focused workspaces:
- Pages
Drag-and-drop no-code components; text, images, lists, forms, Power BI reports and custom PCF controls; onto your web pages, using responsive templates that adapt to any device. - Styling
Apply built-in themes or author bespoke CSS and JavaScript to match Solestyles’ brand identity, with live preview across breakpoints. - Data
Manage your Microsoft Dataverse tables, columns, views and forms in-context defining which data drives each portal component, and enabling inline creation of new Dataverse schema. - Setup
Configure site properties (URLs, languages, regional formats), environment variables, page templates and advanced site settings such as enabling custom domains or integrating external CMS services. - Security
Define Microsoft Entra ID (formerly Azure AD) and Entra External ID authentication providers, assign web roles, configure table and row-level permissions, and enforce GDPR compliant privacy settings.
Key Differentiators vs. Canvas and Model-Driven Apps
Capability | Canvas Apps | Model-Driven Apps | Power Pages |
Target users | Internal staff/mobile | Internal back-office | External customers & partners |
UI approach | Free-form drag-drop | Form-and-view driven | Page-and-section based, responsive |
Offline support | Yes | No | No |
Authentication | Microsoft Entra ID / B2C | Microsoft Entra ID | Microsoft Entra ID, External ID, local identity |
Licensing model | Per-User / Per-App | Per-User | Capacity packs (authenticated/anonymous) |
Supported scenarios | Task-oriented apps | Complex processes | High-volume, data-driven portals |
Why Power Pages for Solestyles’ Ordering Portal?
- 60 % licence savings by shifting 2080 customer seats to capacity packs instead of Per-App licences.
- Brand-first web UX with full control over HTML/CSS/JavaScript delivering a polished boutique feel.
- Scale to thousands of concurrent visitors via built-in CDN and caching, without per-seat overhead.
- Dataverse-native data integration: reuse existing product, order and customer tables, plus Power Automate flows, without additional glue code.
In the next section, we’ll dive into the specific retail-focused features, catalogues, carts, checkouts and order history that you can build in Power Pages to rival any modern ecommerce site.
Key Capabilities for a Retail Portal
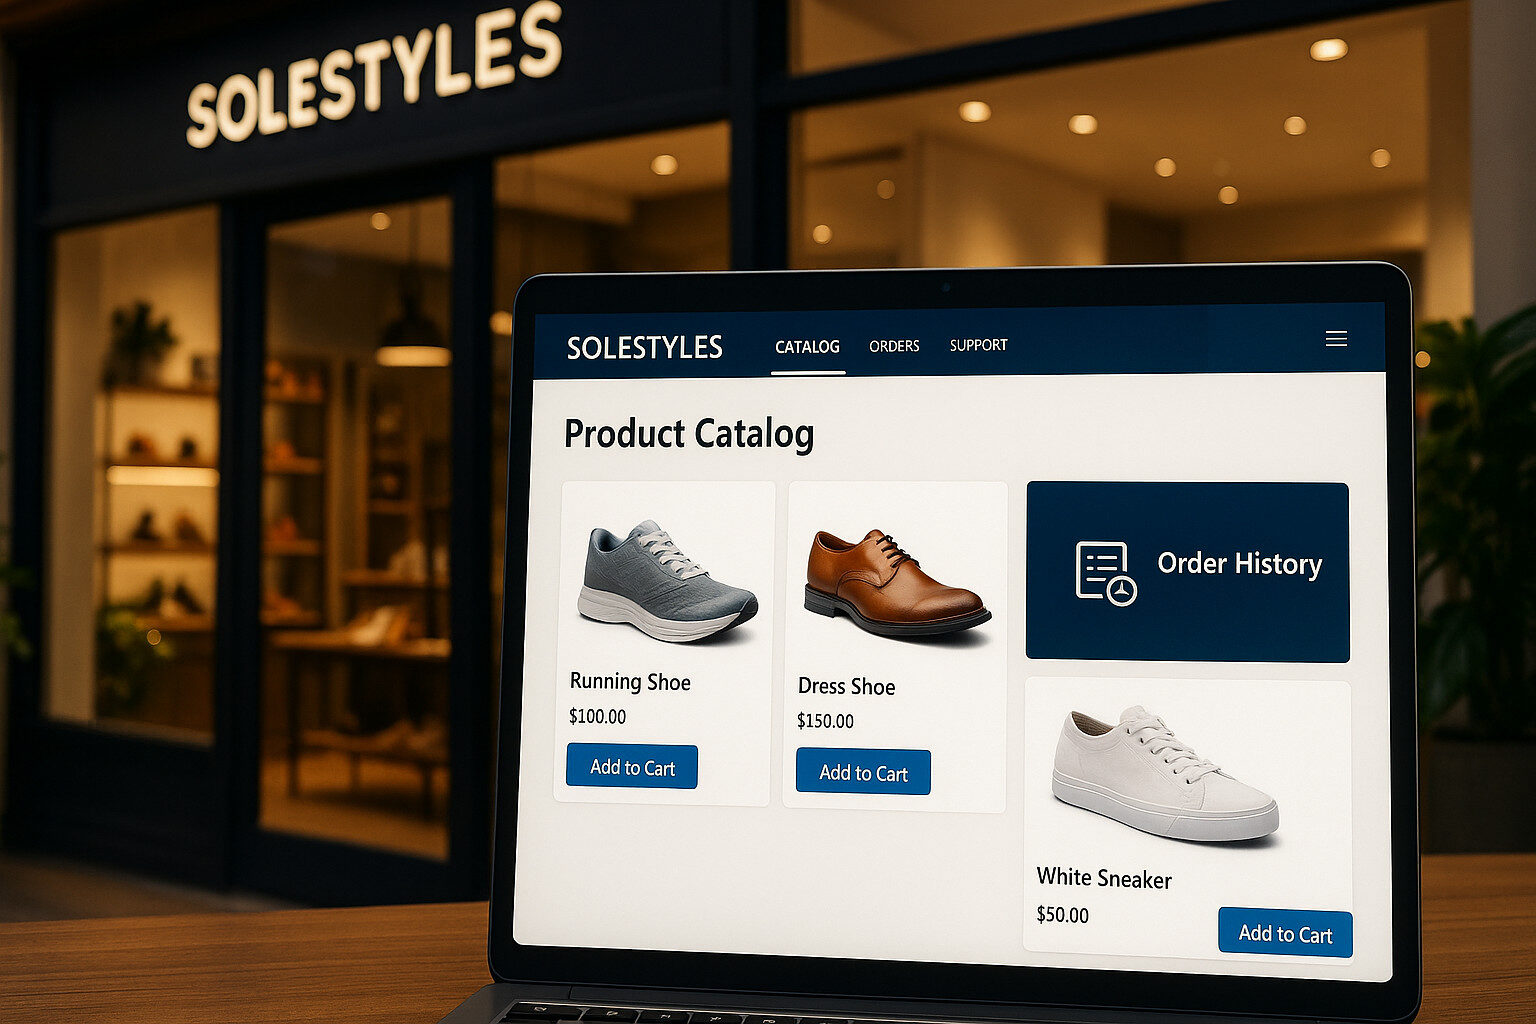 Power Pages delivers a suite of built-in features tailored for ecommerce and self-service scenarios. Here’s how Solestyles Boutique could leverage them:
- Catalog Browsing & Search
- List Components: Drag-and-drop galleries show products with configurable filters (category, size, colour).
- Entity Lists: Advanced search with server-side paging and sorting on Dataverse tables.
- Relevance Tuning: Use column-based weighting to surface bestsellers at the top.
- Add-to-Cart & Checkout
- Entity Forms: Custom forms capture cart items, quantities and options.
- Multi-Step Processes: Use Liquid templates and Power Automate for multi-stage checkouts (review, payment selection, confirmation).
- Embedded Payment Providers: Securely integrate Stripe or Adyen via JavaScript or Custom Connector calls.
- Order History & Self-Service
- Authenticated Lists: Show users their past and in-progress orders by filtering a Dataverse view by their contact record.
- Editable Forms: Allow address updates or cancellation requests via in-portal forms with server-side validation.
- Custom Branding & Responsive Design
- Themes: Configure corporate colours, fonts and logo in the Styling workspace.
- Liquid & CSS: Inject custom HTML/CSS snippets for bespoke layouts ensuring the portal matches the Solestyles boutique aesthetic on all devices.
These capabilities mean customers enjoy a seamless, branded shopping experience while Solestyles reuses its existing Dataverse schema and automation flows without extra integration layers.
Architecture & Data Integration
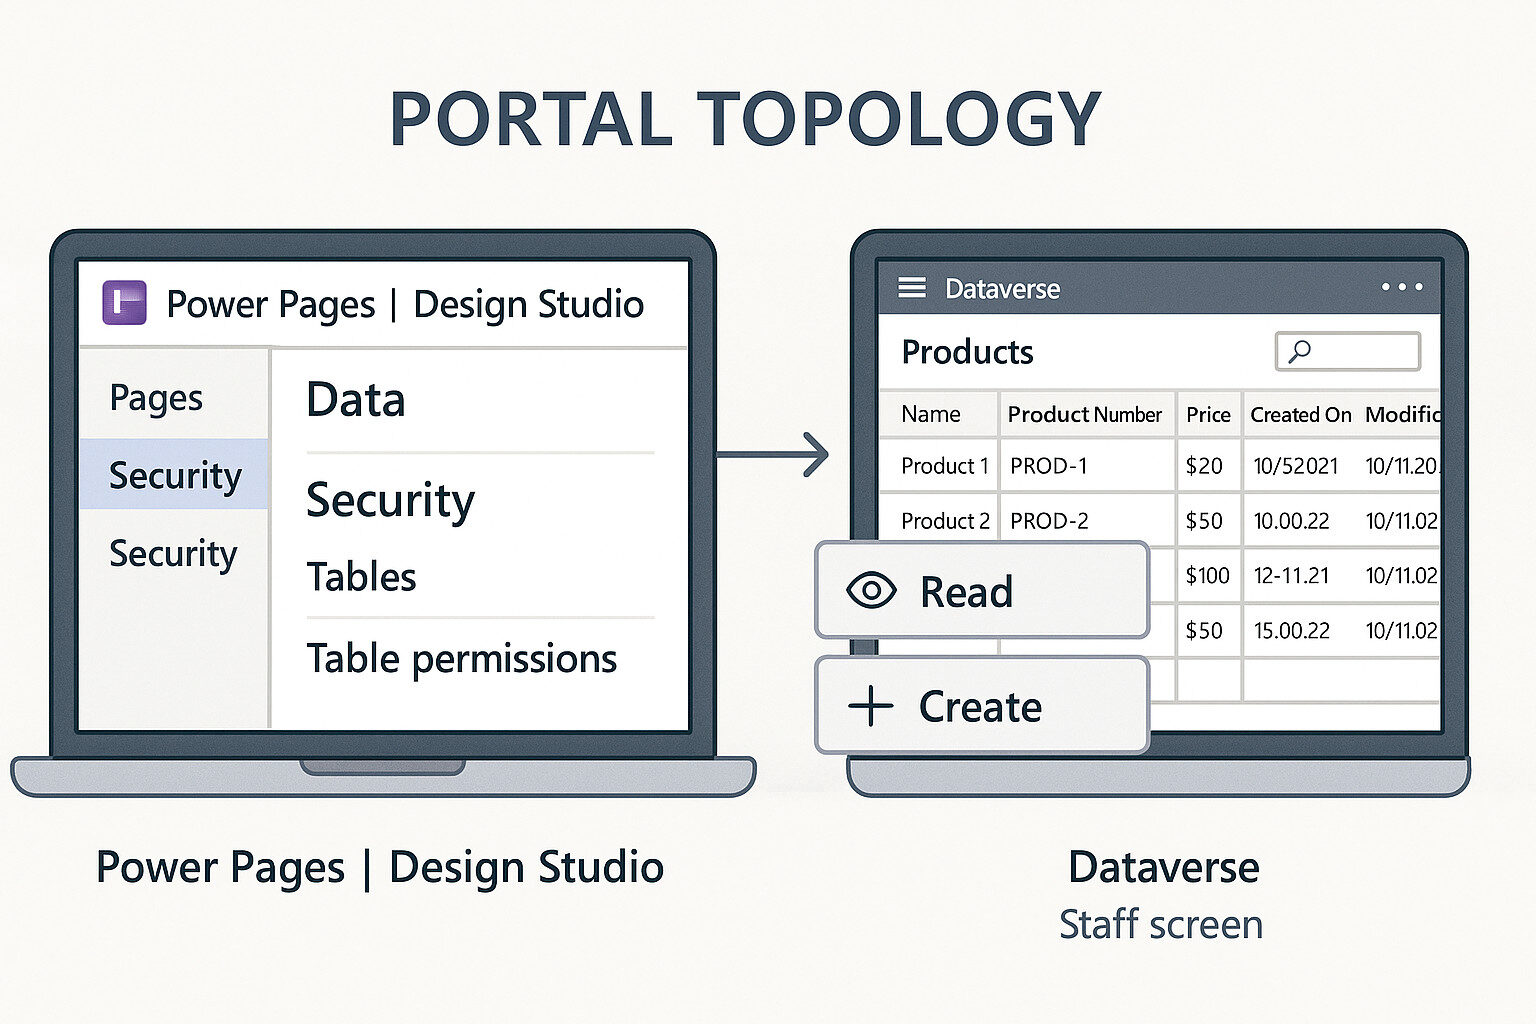 A robust Power Pages solution sits on a clear, maintainable architecture that reuses Solestyles Boutique’s existing Dataverse backbone. In this section, I’ll map out the core components; portal metadata, business tables, entity permissions and explore how to embed Canvas experiences or PCF controls and integrate with external CMS or e-commerce services.
Dataverse as the Single Source of Truth
At the heart of Power Pages is Microsoft Dataverse, which stores both your portal configuration (webpages, content snippets, site settings and web role mappings) and your business data (products, orders, customers). The portal’s application server connects to Dataverse via secure service endpoints, ensuring all CRUD operations flow through the same governed environment.
Portal Metadata & Table Permissions
Power Pages maintains its own set of tables in Dataverse:
- Portal Web Pages and Web Files hold HTML, JavaScript and CSS assets.
- Content Snippets let you author reusable text blocks for banners, footers and disclaimers.
- Site Settings control URLs, language and region defaults.
Table Permissions govern which portal users can view or modify business data. You define Web Roles (e.g. Authenticated Customer, Anonymous Visitor), then assign Table Permissions for each role—specifying create/read/update/delete rights on tables like Product, Order and Contact.
Embedding Canvas & PCF Components
While Power Pages shines as a no-code portal, you can surface richer experiences:
- Canvas App Embeds: Use the Power Apps Component to embed a Canvas screen (e.g. the Solestyles “Quick Order” form) directly in a page. The portal renders the app in an <iframe>, preserving interactivity and offline-capable logic.
- PCF Controls: Leverage the Power Apps Component Framework to drop custom code components; product carousels, image galleries or barcode scanners into forms and lists on your portal pages.
These patterns let you reuse existing Canvas assets without rebuilding them as portal web templates.
External CMS & API Integrations
If Solestyles envisions a hybrid architecture – say, a marketing blog or rich content managed outside Dataverse – you can:
- Headless CMS Connectors: Call out to a CMS (e.g. Contentful, Sitecore) via JavaScript on your pages or via Power Automate flows that sync content into Dataverse.
- RESTful APIs: Use the built-in Liquid template language and the Portal Web API to consume external services; stock level feeds, shipment trackers or partner catalogues directly in page markup.
- Webhooks & Flows: Configure Dataverse Change Tracking and trigger Power Automate flows on data events to push updates to downstream systems or pull data into your portal environment.
Environment Topology
A typical Solestyles topology spans three Power Platform environments:
- Dev: Rapid prototyping of pages, table schema and permissions.
- Test: UAT of authentication flows, table permission rules and external integrations.
- Prod: Managed Power Pages solution imported as Managed to prevent ad-hoc edits, serving live customers via a custom domain with CDN caching.
Deployment uses Solution Packager and the Power Platform CLI to export portal assets, table definitions and site settings ensuring ALM consistency across environments.
Authentication, Security & User Management
Securing your Power Pages portal is paramount when exposing Solestyles Boutique’s products and orders to the public. Power Pages builds on Dataverse’s robust security model with a dedicated Security workspace, where you configure identity providers, web roles and table-and-row-level permissions. Here I cover the latest authentication options, how to manage user access, and the privacy considerations you must address.
Supported Identity Providers
Power Pages supports a broad array of identity providers out of the box:
- Microsoft Entra External ID (formerly Azure AD B2C) A turnkey, scalable consumer-identity service with built-in multi-factor authentication and social-login integration.
- Microsoft Entra ID Use your organisation’s Entra tenant accounts for internal staff or partner communities.
- Social and OpenID Connect Providers Configure any standard OpenID Connect provider e.g. Google, Facebook, LinkedIn or Twitter, via the Security → Identity providers pane.
- Local Authentication A built-in ASP.NET Identity store for simple usernames/passwords not recommended for production due to weaker security and no MFA support.
Configuring Authentication
- Open the Security Workspace In Power Pages Studio, select Security → Identity providers.
- Add or Edit a Provider
- Entra External ID: Click Configure, supply your Entra External ID application details (tenant, scope, callback URL) and customise the sign-in button text.
- Social/OpenID: Choose Add, select your provider template (Google, Facebook, etc.) or Custom, then enter your client ID, secret and well-known OpenID endpoints.
- Set Default Authentication Decide whether anonymous users can browse content or must sign in. Only one OAuth 2.0 provider may be active at a time, but you can enable Local identity alongside Entra External ID for hybrid scenarios.
Web Roles & Table Permissions
After authentication, web roles determine what authenticated users can see and do:
- Define Web Roles In the Security → Web roles workspace, create roles like Customer, StoreStaff and Admin assigning users to each role manually or via automated flows.
- Table Permissions For each Dataverse table (e.g. Products, Orders), click Permissions, add your web roles, and specify Create/Read/Update/Delete scopes (Global, Local, Contact).
- Row-Level Security Combine web roles with Dataverse’s native row-level security; assign records to teams or individual contacts so, for example, a customer sees only their own orders.
Anonymous vs Authenticated Scenarios
- Anonymous Access Allow visitors to browse product catalogues without signing in, ideal for marketing or general browsing.
- Authenticated Access Require sign-in to add items to cart, view order history or access exclusive content. Use Contact forms to capture minimal details before upgrading anonymous users to registered contacts.
GDPR & Privacy Considerations
- Consent Banners Integrate GDPR-compliant cookie-consent pop-ups using portal scripts or PCF controls.
- Data Retention Configure Dataverse table policies to automatically purge contacts and orders older than 12 months if required by policy.
- Secure Transmission Power Pages uses HTTPS by default and stores all authentication tokens securely in Entra.
Data Storage & Entitlements
Power Pages portals rely on the common data layer of Dataverse—so understanding your storage entitlements and how to manage capacity is critical to controlling costs and ensuring performance. In this section, we’ll look at what you get “out of the box,” how additional capacity works, and strategies for keeping your order history lean.
Built-In Storage Entitlements
Every Power Pages capacity pack contributes Dataverse storage to your tenant meaning you don’t have to buy separate database or file space. Specifically:
- Authenticated User Capacity Packs (100 users per pack) each accrue 2 GB Dataverse database and 16 GB Dataverse file capacity.
- Anonymous User Capacity Packs (500 users per pack) each accrue 0.5 GB database and 4 GB file capacity.
These entitlements sit on top of your environment’s default storage, which provides:
- 3 GB Dataverse database,
- 3 GB Dataverse file,
- 1 GB Dataverse log capacity.
You can view and manage these totals in the Power Platform Admin Center under Environments → [YourEnv] → Capacity.
Purchasing Additional Capacity
If your portal’s order volumes or file uploads exceed these limits, you can purchase add-on capacity in 1 GB increments for both database and file storage:
- In the Microsoft 365 Admin Center, open Billing → Purchase services.
- Search for Dataverse capacity add-ons.
- Buy additional Dataverse Database or Dataverse File capacity at one-gigabyte granularity.
This flexibility ensures you only pay for what you need and you can scale up storage immediately as demand grows.
Archival & Retention Strategies
Historic order data can accumulate rapidly. To keep your Dataverse footprint manageable:
- Archive Older Records: Use a Power Automate flow to off-load orders older than 12 months to an Azure Blob Storage container or a SharePoint library. Then delete or flag them in Dataverse.
- Leverage External File Storage: Store large assets; product images, PDFs, attachments etc. in Azure Blob or Entra ID B2C-managed storage and save only URLs in Dataverse.
- Implement Retention Policies: Define lifecycle rules (e.g., purge cancelled or completed orders after 6 months) via scheduled background flows or Azure Data Factory pipelines.
These practices minimise your paid Dataverse storage, reduce backup sizes and improve portal performance.
Monitoring & Best Practices
- Capacity Alerts: Set up email alerts in the Admin Center when database or file usage exceeds a threshold (e.g., 80 % of entitlement).
- Regular Reviews: Quarterly, audit your environment’s Capacity Analytics to spot growth trends and adjust portal user counts or purchase add-ons proactively.
- Clean Up Unused Tables: Remove or archive custom tables and fields no longer in use; every table consumes metadata and contributes to your storage footprint.
By leveraging capacity-based entitlements, purchasing add-on capacity only when needed, and implementing archival policies, you ensure your Power Pages portal remains both performant and cost-efficient; ready to scale as Solestyles Boutique grows.
Automation & Business Logic with Power Automate
Power Pages isn’t just a static website; it’s a dynamic, data-driven portal that can invoke robust server-side logic via Power Automate. In Solestyles’ case, flows power everything from order submission to stock-level checks. Here’s how to integrate and manage your business logic securely and at scale.
Prerequisites
- Power Pages version ≥ 9.5.4.xx and starter site ≥ 9.3.2304.x.
- A Power Automate Premium licence for the service account that hosts your flows.
- All flows must be solution-aware and published in the same solution as your portal.
Creating & Adding a Cloud Flow
- In Power Pages Studio
- Go to Set up → Integrations → Cloud flows, then click + Create new flow.
- Select the Trigger
- Choose When Power Pages calls a flow (Dataverse connector).
- This generates a secure API endpoint under the covers.
- Define Inputs
- Click + Add an input and select from Text, Number, Boolean or JSON e.g., cartItems, customerId, address.
- Build Your Logic
- Add actions: Create a row (Dataverse) to record the order, Update a row to adjust stock, Send an email (V2) for confirmations.
- Return Values
- End with Return value(s) to Power Pages, defining JSON properties like orderId, status or errorMessage.
- Save and Publish the flow.
Attaching the Flow to Your Portal
- In the Pages workspace, edit the page or form where you want the flow to run (e.g., Checkout form).
- Select the button (e.g., Submit Order) and choose + Configure flow in its properties pane.
- Bind Inputs
- Map form fields or list selections to your flow’s input parameters.
- Assign Web Roles
- Under the flow’s settings, choose which Web Roles (e.g., Authenticated Users) can invoke it.
Service Account vs User Context
- Service-Account Model
- All flows run under a single or per-store service account.
- Simplifies licensing (one Premium licence) and centralises audit logs.
- Per-User Model
- Flows execute under the calling user’s identity, providing per-user audit trail but requiring each user to hold a Power Automate licence.
- Best for scenarios requiring strict user-level traceability.
Solestyles Use Cases
- Order Submission: Pass the user’s cart details to a flow that creates order and order-line records, triggers confirmation emails, and updates inventory.
- Stock Checker: A simple button on product pages invokes a flow to retrieve real-time stock levels from Dataverse, displaying “In Stock” or “Backorder” messages.
- Contact & Feedback: “Contact Us” form fields feed into a flow that creates a support ticket record and sends an acknowledgement email.
Best Practices
- Solution-Aware Flows: Always build and maintain flows within the same solution as your portal.
- Run-After & Error Handling: Use Scopes and Configure run after to catch failures, log errors to a FlowErrors table, and return user-friendly messages.
- Secure Inputs: Validate all incoming values (e.g., quantity > 0, address not empty) before writing to Dataverse.
- Web Role Enforcement: Restrict sensitive flows (order submission, data changes) to authenticated roles; keep anonymous flows strictly read-only.
- Monitor & Scale: Track flow performance in the Power Automate analytics blade; offload heavy logic to child flows or Azure Functions if latency spikes.
Licensing & TCO Comparison
Choosing between per-seat licences and capacity-based plans is critical for balancing cost against user experience. Below, we break down three Power Pages licensing models; capacity subscriptions, pay-as-you-go meters and Canvas Per App seats; to illustrate the potential savings for Solestyles’ 2080 customer users.
Capacity Subscription Packs
Authenticated Users
- $200 / 100 users / site / month (paid yearly)
- Includes 2 GB database + 16 GB file capacity per pack
- Solestyles example: 2080 customers → 21 packs × $200 = $4 200 / month
Anonymous Users
- $75 / 500 users / site / month (paid yearly)
- Includes 0.5 GB database + 4 GB file capacity per pack
- Solestyles example (if anonymity suffices): 2080 users → 5 packs × $75 = $375 / month
Capacity subscriptions offer predictable budgeting and pooled storage entitlements ideal when you can forecast or control user volumes.
Pay-As-You-Go Meters
For more dynamic traffic patterns, Power Pages pay-as-you-go meters track active users each month:
- Authenticated users: $4 / active user / month
- Anonymous users: $0.30 / active user / month
Solestyles example:
- Authenticated: 2080 × $4 = $8320 / month
- Anonymous: 2080 × $0.30 = $624 / month
Metered billing can lower upfront costs, but requires careful monitoring to avoid spikes during seasonal promotions.
Side-by-Side: Canvas Per App vs Power Pages
Model | Unit Cost | Seats / Volume | Monthly Cost | Notes |
Canvas Per App | $12 / seat / month | 2080 seats | $24,960 | Pixel-perfect app UX; 2 000-seat minimum |
Power Pages Capacity (Auth.) | $200 / 100 users / month | 21 packs (2 100 users) | $4200 | Full Dataverse integration, responsive web |
Power Pages Capacity (Anon.) | $75 / 500 users / month | 5 packs (2 500 users) | $375 | Best for lightweight, browse-only portals |
Power Pages PAYG (Auth.) | $4 / active user / month | Variable | $8320 | Ideal for unpredictable, authenticated traffic |
Power Pages PAYG (Anon.) | $0.30 / active user / month | Variable | $624 | Useful for ad-hoc anonymous usage |
By moving from a $24960/month Canvas-Per-App model down to a $4200 capacity subscription or even $375 for anonymous users, Solestyles can unlock up to 85% savings on customer-facing licences, while maintaining enterprise-grade security, branding and Dataverse-native data flows.
This cost comparison shows why Power Pages is a compelling alternative for high-volume storefront scenarios. Next I will cover Limitations & Trade-Offs, so you can weigh these savings against feature considerations.
Limitations & Trade-Offs
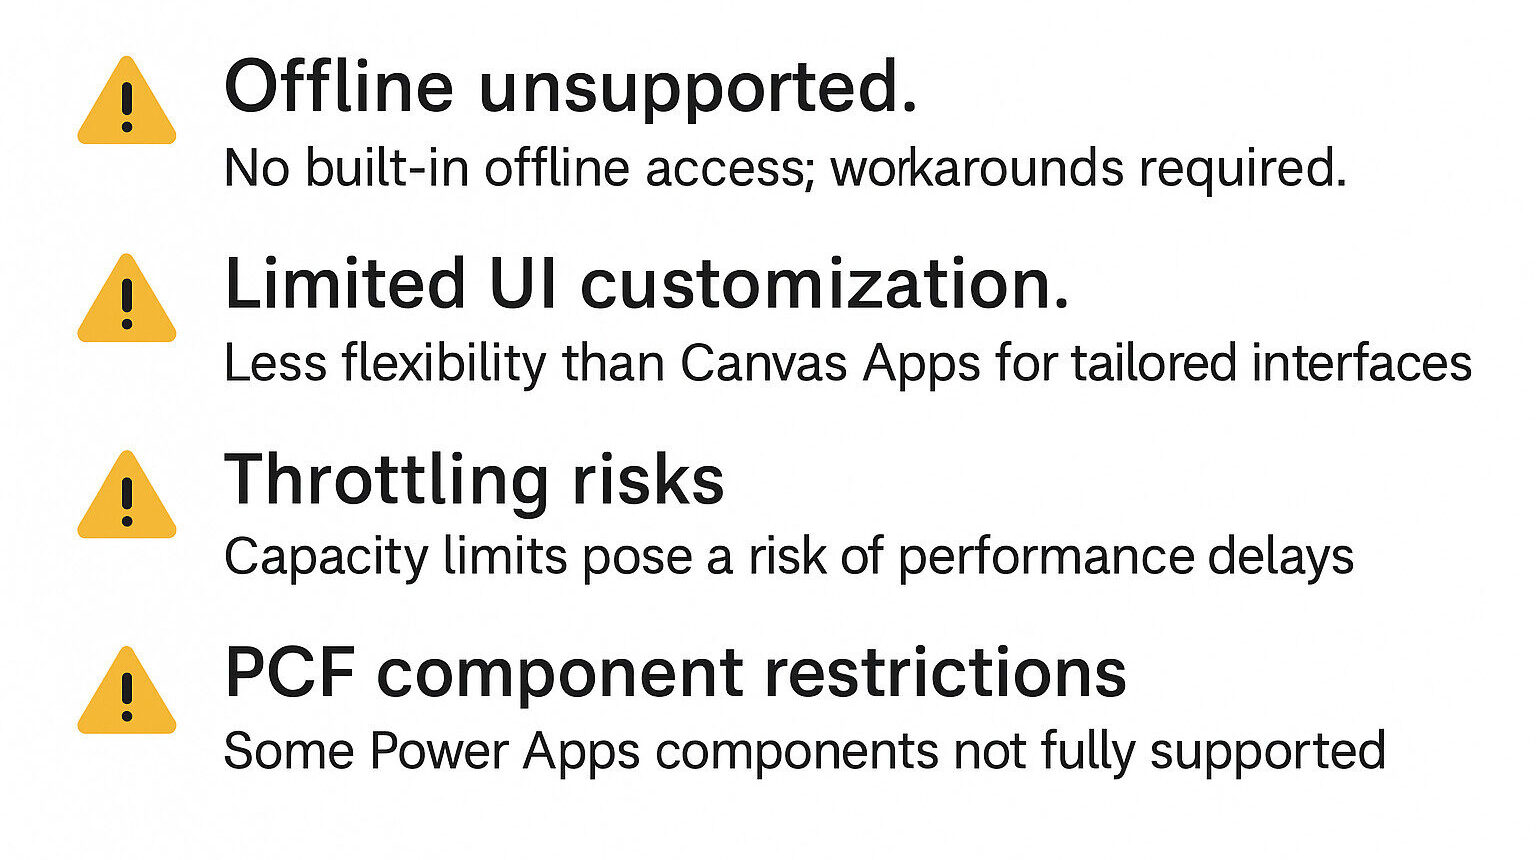
While Power Pages offers significant cost and scale advantages, it comes with trade-offs that Solestyles and any portal-based solution must weigh carefully:
No Built-In Offline Support
Power Pages does not natively support offline browsing or data entry. Any attempt to work offline requires advanced workarounds such as PWA enablement combined with custom PCF controls and IndexedDB caching which remain unsupported and brittle in production.
Limited UI Customisation
Unlike Canvas Apps’ pixel-perfect drag-and-drop canvas, Power Pages relies on prebuilt templates and section-based layouts:
- You can inject custom CSS and JavaScript, but deep UI modifications often conflict with the portal framework.
- Full-width, fluid grid layouts and advanced animations may require bespoke PCF components adding development complexity and ongoing maintenance.
Performance & Throttling Risks
Portals operate on capacity-based limits, where high request volumes can lead to throttling and slower page loads:
- Daily request quotas for non-authenticated (anonymous) and authenticated users can be exceeded, triggering 429 errors.
- Customers may need to purchase additional Power Platform request capacity add-ons to avoid service protection limits each add-on grants another 50,000 requests per 24 hours.
- Throttling can degrade user experience during flash promotions or high-traffic campaigns.
Feature Gaps & Compatibility
Certain Power Apps Component Framework (PCF) controls and advanced features are not fully supported in portals:
- Custom pages in model-driven apps support only a subset of PCF APIs; some events and web resources may fail to load or function offline.
- Table and row-level permissions in Power Pages are robust but cannot enforce complex business logic the way Model-Driven Business Process Flows do.
- Integration with external CMS systems or advanced ecommerce engines requires custom connectors or middleware adding latency and potential points of failure.
Balancing these limitations against the substantial licence savings (up to 60 % on customer seats) is key. So how can it be implemented? In the next section, I outline a fictitious Implementation Roadmap to pilot a Power Pages storefront for Solestyles Boutique mitigating these trade-offs through best practices and incremental proofs of concept.
Implementation Roadmap
Bringing Solestyles’ Power Pages proof-of-concept into production requires a clear, phased approach. Below is a step-by-step roadmap aligned with Microsoft’s latest guidance, to plan, build, test and launch a secure, scalable retail portal on Dataverse.
Planning & Environment Setup
- Define Requirements & Personas:
Revisit your discovery artefacts: list customer journeys (browse, add-to-cart, checkout, order history) and staff-admin scenarios (inventory review, special orders). Map user roles (anonymous shopper, authenticated customer, store assistant, admin) to portal web roles and Dataverse table permissions. - Provision Environments:
Create separate Dev and Test Dataverse environments with Power Pages capacity packs (authenticated + anonymous). – Enable TDS endpoint and required Dataverse add-ons (e.g. Dataverse Search) in each environment. - Set Up Source Control & ALM:
Install the Power Platform CLI and Power Pages CLI extensions. Initialise a Git repository and establish CI/CD pipelines to export/import portal configuration between Dev→Test→Prod.
Portal Template Selection & Design
- Choose a Starter Template – For Solestyles’ storefront, select the Customer Self-Service template: it includes catalog list pages, forms and basic authentication flows.
- Customise Page Layouts – In the Pages workspace, modify templates to reflect Solestyles’ branding: swap in your logo, adjust hero images and refine navigation labels.
- Styling & Theme – Use the Styling workspace to import your boutique’s JSON theme (colours, fonts) and apply custom CSS for bespoke header/footer designs.
Table, Form & Page Configuration
- Data Workspace – Import or verify existing Dataverse tables: Products, Orders, OrderItems, Contacts. Create model-driven Forms for checkout and admin pages; define views for catalog listings, order history and inventory management.
- Page Assembly – Build key pages:
- Catalog: list view with filters on Size, Colour, Collection
- Product Details: record view form with Add to Cart button
- Cart & Checkout: multi-step form collecting Address, Payment, Delivery/Collection options
- Order History: list view for authenticated customers
- Component Embedding – Inject Canvas App components or PCF controls where needed (e.g. size selectors, image galleries) for enhanced interactivity.
Authentication & Security Testing
- Configure Identity Providers – Register a Microsoft Entra B2C tenant for customer sign-up/sign-in, with social or local identity options. – Enable Microsoft Entra ID (internal) for staff/admin access.
- Define Web Roles & Table Permissions – Create roles: Anonymous, Customer, StoreAssistant, Admin. – Assign table and row-level permissions in the Security workspace, ensuring each role only sees appropriate data.
- Validation – Use the Portal Management app to simulate each web role, confirming pages and data access behave as expected.
UAT, Performance Tuning & Go-Live Checklist
- User Acceptance Testing – Conduct UAT with sample customers and store staff: verify end-to-end flows (browse → order → confirmation → admin notifications). – Capture feedback on usability, performance and branding consistency.
- Performance & Load Testing – Test page load times and form submissions under simulated load (e.g. 100 concurrent users), leveraging browser DevTools and Azure Application Insights. – Tune list page pagination, enable portal caching and CDN settings.
- Go-Live Preparation – Custom Domain & SSL: configure DNS, upload certificates. – Licensing Assignment: apply authenticated/anonymous capacity packs to Production environment. – Backup & Rollback Plan: snapshot configurations and Dataverse data.
- Launch & Monitor – Enable Portal Analytics and Power Platform Admin monitoring; set alerts on error rates and performance thresholds. – Schedule a phased rollout: start with a pilot store group before full customer launch.
With this detailed roadmap, grounded in the latest Microsoft documentation you can steer the Solestyles Power Pages initiative from concept to live portal, confident that every step is planned, tested and managed for success.
Conclusion & Next Steps
 As I wrap up this Alternative Power Pages Option deep dive, it’s clear that Power Pages represents a powerful, cost-efficient approach for customer-facing experiences. By evaluating the licensing TCO and functional fit against Solestyles’ existing Canvas App based ordering application, you now have the insights to decide whether a portal makes sense for your own high-volume workloads.
Key Takeaways
- Significant Cost Savings: Capacity-based pricing (authenticated/anonymous) can reduce customer licence fees by over 60 %.
- Rich Web UX: Leveraging Dataverse tables, lists and forms in a fully brandable portal enables a polished, responsive storefront.
- Seamless Integration: Reuse existing data architecture; products, orders, customer tables and Power Automate flows with minimal change.
- Governance & Security: Built-in Microsoft Entra ID/External ID support, web roles and table permissions ensure enterprise-grade protection.
- Trade-Off Awareness: Understand the offline, UI flexibility and performance constraints, and plan accordingly.
Next Steps
- Proof-of-Concept
- Spin up a sandbox with a 100-user capacity pack to prototype the core ordering journey: catalogue, cart, checkout and order history.
- Security Review
- Configure Entra ID B2C identity providers and web roles; test table- and row-level permission models to protect sensitive data.
- Performance Validation
- Load-test the portal with concurrent anonymous and authenticated users; optimise page metadata, caching and CDN settings.
- UX Polish
- Apply Solestyles’ visual theme, test across devices, and gather feedback from a select group of customers and store staff.
- Licensing Decision
- Compare monthly capacity pack costs to Canvas Per App spend; model three, six and twelve-month TCO scenarios.
- Pilot & Rollout
- Launch the portal with a small customer cohort; refine based on analytics and user feedback before scaling to full production.
By following these next steps, you’ll be equipped to make a confident, informed decision on whether Power Pages is the right “next chapter” for you.
Thank you for joining this series; I look forward to sharing more insights and success stories in the future!

 Microsoft Power Pages is the evolution of Power Apps Portals; a secure, enterprise-grade, low-code SaaS platform for building data-driven websites on top of Dataverse. Released as a standalone product in 2023, Power Pages combines the familiarity of Power Platform with new tooling and capacity-based licensing tailored for external (anonymous or authenticated) users.
 Power Pages delivers a suite of built-in features tailored for ecommerce and self-service scenarios. Here’s how Solestyles Boutique could leverage them:
 A robust Power Pages solution sits on a clear, maintainable architecture that reuses Solestyles Boutique’s existing Dataverse backbone. In this section, I’ll map out the core components; portal metadata, business tables, entity permissions and explore how to embed Canvas experiences or PCF controls and integrate with external CMS or e-commerce services.
 As I wrap up this Alternative Power Pages Option deep dive, it’s clear that Power Pages represents a powerful, cost-efficient approach for customer-facing experiences. By evaluating the licensing TCO and functional fit against Solestyles’ existing Canvas App based ordering application, you now have the insights to decide whether a portal makes sense for your own high-volume workloads.