Introduction: Why Power Automate?
Automation is the invisible engine that propels modern digital experiences. For Solestyles Boutique, the Canvas App and Model-Driven App have laid the groundwork; a mobile-first interface for staff on the shop floor and a structured, process-driven portal for administrators. Yet behind every tap on a “Pay Now” button or click of “Process Order,” there must be a reliable, secure mechanism to process payments, update stock levels, send notifications and orchestrate business logic. That mechanism is Power Automate.
Power Automate sits at the heart of the end-to-end solution, seamlessly connecting user-facing experiences to back-office processes and external systems. It transforms manual, error-prone tasks into resilient flows that can retry on failure, log every step for auditing and adapt to changing business requirements without a single line of custom code. Whether it’s validating a customer’s payment, notifying the buying team of special orders via Microsoft Teams or sending a daily low-stock report to the procurement lead, Power Automate makes each step repeatable, observable and governed.
In this post, you will learn not only how to create individual flows, but how to build them solution-aware, ensuring they travel with the rest of your components from Development to Test to Production. I’ll explore error-handling patterns that prevent failures from going unnoticed, demonstrate key flow design patterns for payment orchestration and scheduled reports, and preview advanced techniques like Adaptive Card approvals and custom connectors that enable Solestyles Boutique to adapt quickly to new opportunities.
By the end of this post, you’ll appreciate how Power Automate is more than just a background service: it’s the vital link that binds together UI, data and business outcomes across the Power Platform. Let us begin by setting up the solution-aware flows and configuring the environment variables that underpin them.
Setting Up Solution-Aware Flows
Before you author a single step in Power Automate, it’s essential to anchor your automations inside the same Solestyles Boutique solution you created for Canvas and Model-Driven Apps. This guarantees that your flows, connectors and configuration travel together through Development, Test and Production, preserving environment-specific settings and security boundaries.
Establishing Your Flow in the Solution
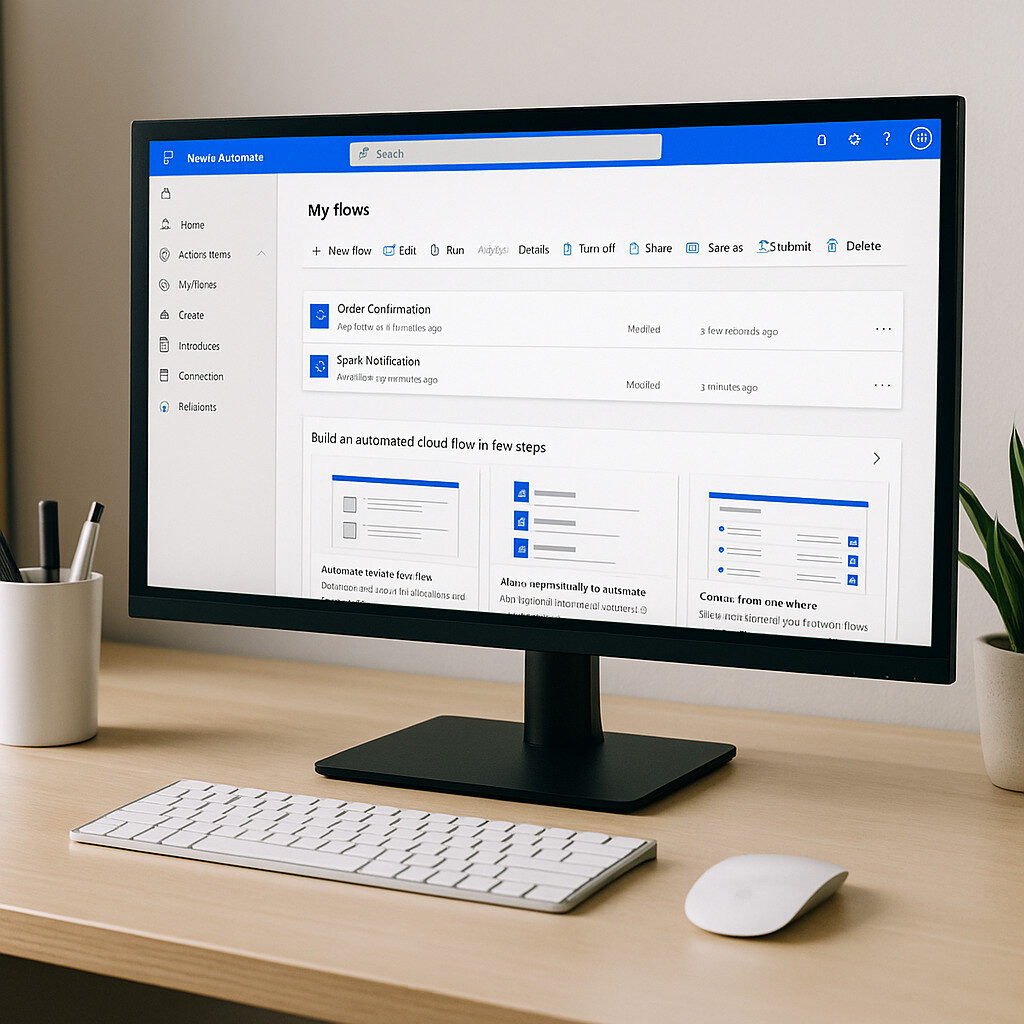
- Open Power Apps Maker – Browse to https://make.powerapps.com → Solutions → Solestyles Boutique.
- Create a New Cloud Flow – Click New → Cloud flow → Automated cloud flow (or “Instant” if you prefer a button-trigger).
- Name and Trigger –
- Name: e.g. OrderProcessingFlow
- Trigger: choose When an HTTP request is received (for Canvas-driven payment) or When a record is created (Dataverse)
- Save – Your blank flow now lives in the solution, not in your personal environment, ready to inherit shared variables and connections.
By authoring directly within the solution, the flow’s GUID, permissions and dependencies move seamlessly whenever you export or upgrade the solution package.
Defining and Consuming Environment Variables
Rather than hard-code endpoints or keys, store them in solution-scoped variables:
- Add Environment Variables – In Solestyles Boutique solution, click New → Environment variable three times to create:
- PaymentGatewayURL (URL)
- PaymentGatewayKey (Secret)
- NotificationEmail (Text)
- Reference in Your Flow – Inside your flow, any action that needs the gateway URL or key can now select Environment variable from dynamic content ensuring the same configuration is used in Dev/Test/Prod, with only the variable values differing per environment.
Creating and Binding Connection References
Each connector action in Power Automate should use a connection reference defined at the solution level:
- Add Connection References – Click New → Connection reference and add:
- Dataverse (for record creation/updates)
- Office 365 Outlook (for customer emails)
- HTTP with Entra ID (for secure calls to third-party APIs)
- Bind Actions to References – When you insert a Dataverse “Create a record” step, ensure the Connection dropdown shows CR_Dataverse rather than a personal connection. This makes the flow fully portable.
Managing Flow Permissions & Service Accounts
Automations often need elevated rights without relying on a single user:
- Use Service Principals or Managed Identities – For HTTP or custom connectors, configure an Entra ID app registration and assign it a role (e.g., Dataverse service principal).
- Grant Flow Owners – In the flow’s … → Manage permissions, add your integration account or a dedicated “Solestyles Automation” service account with Co-owner rights so the flow runs under a predictable, monitored identity.
- Enforce Principle of Least Privilege – Only grant each service principal the minimum table privileges (e.g., Create on Orders, Update on Products) needed for the flow to succeed.
Why This Matters
By embedding your flows within the solution, referencing variables and connection references, and using service-level identities, you achieve:
- Portability: Flows work identically across environments with no manual re-configuration.
- Security: Credentials are never exposed in plain text and run under dedicated service identities.
- Governance: All automation logic resides under the same ALM pipeline as apps and data models.
With your flows now solution-aware, let’s move on to the patterns that make them resilient; error handling, scopes and retries.
Error Handling & Scope Patterns
 In any robust automation solution, you must assume that:
- External services can fail
- Data may be malformed, and
- Network interruptions can occur.
Error handling and Scope actions in Power Automate provide the mechanisms to catch, manage and recover from these issues ensuring your flows remain resilient and transparent. Below, I explore essential patterns for grouping logic, configuring retries and creating fallback paths.
Grouping Logic with Scope Actions
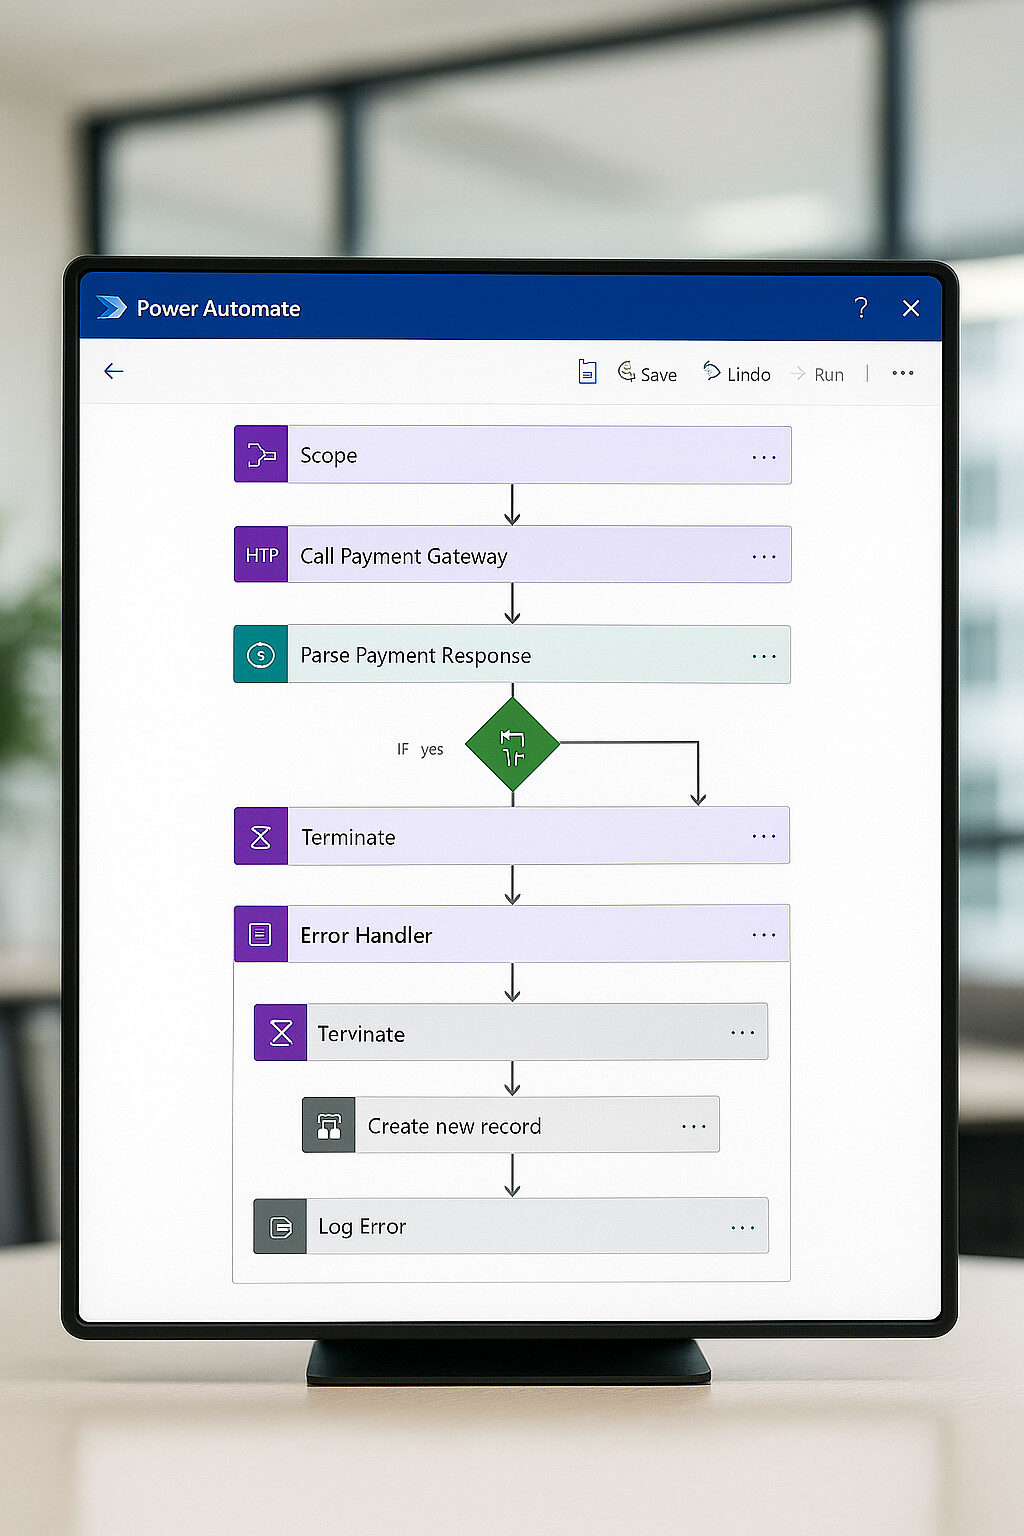
A Scope action acts as a container for a series of steps, enabling you to treat them as one logical unit:
- Insert a Scope
- Within your flow, select New Step → Control → Scope, and name it Main Scope.
- Populate the Scope
- Add actions such as HTTP: Call Payment Gateway and Parse JSON inside this scope.
- Benefits
- Scope results appear as a single block in run history for clarity.
- You can apply run-after conditions on the entire scope rather than individual actions.
Configuring run-after for Retries and Fallbacks
Every action within Power Automate supports a run-after setting, allowing you to direct flow execution based on success, failure, skipped or timed-out outcomes:
- Add an Error Handler Scope
- After Main Scope, insert a second Scope named Error Handler.
- Configure run-after
- Click the ellipsis (⋯) on Error Handler → Configure run after.
- Check has failed, has timed out and has skipped.
- Design Fallback Steps
- Inside Error Handler, include actions like Create a new record in a FlowErrors Dataverse table and a Send email to administrators.
Custom Retry Loops
While many connectors offer built-in retry policies, you may need precise control over retry intervals and counts:
// Example: Retry HTTP call up to 3 times with 30s delay
Until → Condition: @{outputs('HTTP')['statusCode']} == 200
Timeout: PT2M
Count: 3
Inside: HTTP: Call Payment Gateway Delay: PT30S
- Until loops check for a successful status code, retrying as specified.
- Timeout and Count properties prevent infinite retries.
Parallel Branches for Alternate Paths
To handle success and failure in distinct branches:
- Add a Parallel Branch
- After Main Scope, click the plus icon and choose Add a parallel branch.
- Success Path
- In one branch, configure run-after on the next action for is successful.
- Failure Path
- In the other, apply run-after for has failed to route to Error Handler.
This approach visually separates happy-path logic from recovery steps, making flows easier to read and maintain.
Logging & Monitoring
Transparent error reporting is critical for ongoing governance:
- Dataverse Logging
- In Error Handler, use Create a new record in a custom FlowErrors table, capturing fields:
- FlowName: workflow()[‘name’]
- StepName: triggerOutputs()?[‘headers’][‘x-ms-workflow-action-name’]
- ErrorMessage: actions(‘Main Scope’).error.message
- Timestamp: utcNow()
- Application Insights
- For advanced telemetry, send custom events via the HTTP with Entra ID connector to Application Insights or Log Analytics.
Best Practices
- Scope Granularity: Keep scopes focused—one for critical path, one for error handling, etc.
- Clear Naming: Prefix scopes and actions with Main_, Error_, so operators can pinpoint issues quickly.
- Consistent Patterns: Use a template flow skeleton with scopes, run-after settings and logging to standardise across flows.
- Documentation: Annotate scope and branch elements with comments describing their purpose and conditions.
By architecting your flows with scopes, run-after configurations, retry loops and logging, Solestyles Boutique’s automations become fault-tolerant and easily diagnosable—qualities essential for enterprise-grade reliability.
OrderProcessingFlow: Payment through Fulfilment
The “OrderProcessingFlow” is the workhorse of the automation layer. It turns a customer’s “tap on Pay Now” into a full transaction:
- Validating payment
- Creating order records
- Adjusting stock levels, and
- Notifying the customer.
In this section, I walk through each step from the HTTP trigger to the final response, showing you how to build a resilient, solution-aware flow that ties a Canvas App to Dataverse.
Trigger: When an HTTP Request Is Received
To start, the Canvas App issues a POST to Power Automate’s HTTP endpoint. In the flow:
- Add Trigger
- Action: When an HTTP request is received (in the Request connector)
- Method: POST
- Request Body JSON Schema (sample):
{
"type": "object",
"properties": {
"UserID": { "type": "string" },
"CartItems": { "type": "array",
"items": {
"type": "object",
"properties": {
"ProductID": { "type": "string" },
"Size": { "type": "string" },
"Colour": { "type": "string" },
"Quantity": { "type": "integer"}
},
"required": ["ProductID","Quantity"]
}
},
"DeliveryMethod": { "type": "string" },
"Address": { "type": "string" }
},
"required": ["UserID","CartItems"]
}
- Save – After saving, Power Automate generates a secure HTTP POST URL – copy this into your Canvas app’s .Run() call.
Payment Validation Scope
Encapsulate payment logic in its own Scope named PaymentScope:
- Add Scope:
- Name: PaymentScope
- HTTP Action:
- Connector: HTTP with Entra ID (using CR_Payment connection reference)
- Method: POST
- URI: @{variables(‘PaymentGatewayURL’)}/charge
- Headers:
{
    "Content-Type": "application/json",
    "x-api-key": "@{variables('PaymentGatewayKey')}"
}
- Body:
{
    "userId": "@{triggerBody()?['UserID']}",
    "amount": @{sum(triggerBody()?['CartItems'],'Quantity' * items()?['UnitPrice'])},
    "currency": "GBP",
    "paymentMethod": "card"
}
- Parse JSON:
- Content: Body of the HTTP action
- Schema:
{
    "type":"object",
    "properties":{
         "status":"string",
         "transactionId":"string",
         "message":"string"
    }
}
Branching on Payment Outcome
Add a Condition after PaymentScope:
@equals(body('Parse_JSON')?['status'], 'Success')
- If Yes (payment succeeded), proceed to FulfilmentScope.
- If No, jump to ErrorScope for payment failures.
Fulfilment Scope
Within Scope named FulfilmentScope, perform your data operations:
- Create Order Header
- Action: Add a new row (Dataverse)
- Table name: Orders
- Columns:
- Customer: triggerBody()?[‘UserID’]
- OrderDate: utcNow()
- DeliveryMethod: triggerBody()?[‘DeliveryMethod’]
- ShippingAddress: triggerBody()?[‘Address’]
- For Each Cart Item
- Action: Apply to each over triggerBody()?[‘CartItems’]
- Add Order Line (Dataverse):
- Table: OrderLines
- Columns:
- Order: body(‘Create_Order’)?[‘orderid’]
- Product: items(‘Apply_to_each’)?[‘ProductID’]
- Quantity: items(‘Apply_to_each’)?[‘Quantity’]
- Size, Colour accordingly
- Adjust Stock:
- Action: Get a row by ID (Dataverse on Products)
- Action: Update a row (Dataverse), setting text
InStock = sub(outputs('Get_Product')?['body/InStock'],
items('Apply_to_each')?['Quantity'])
- Send Confirmation Email
- Action: Send an email (V2) (Office 365 Outlook via CR_Outlook)
- To: triggerBody()?[‘UserID’]’s email (lookup via Contacts table)
- Subject: “Your Solestyles Order [@{body(‘Create_Order’)?[‘ordernumber’]}]”
- Body: HTML summary of items, total, expected delivery details
Responding Back to the App
Finally, add the Response action (Request connector) at the end of the success branch:
- Status Code: 200
- Headers:
{
"Content-Type": "application/json"
}
- Body:
{
"Status": "Success",
"OrderID": "@{body('Create_Order')?['orderid']}",
"TransactionID": "@{body('Parse_JSON')?['transactionId']}"
}
Failure Path & Logging
In the Else branch or within an Error Scope (configured with run-after on has failed/has timed out):
- Log to Dataverse
- Add a new row to a FlowErrors table, capturing:
- FlowName: workflow()[‘name’]
- Error: body(‘Parse_JSON’)?[‘message’] or the HTTP action’s statusCode
- Context: Full trigger body serialized
- Response
- Status Code: 400 or 500
- Body:
{
"Status": "Failure",
"Error": "@{body('Parse_JSON')?['message']}"
}
Best Practices Recap
- Solution-Aware Trigger: Always create flows within your solution.
- Scoped Logic: Separate payment, fulfilment and error handling into distinct Scopes.
- Dynamic Content: Reference environment variables for URLs and keys.
- Clear Responses: Return structured JSON so your Canvas App can react appropriately.
- Audit Trail: Log failures to a Dataverse table for post-mortem analysis.
With OrderProcessingFlow in place, Solestyles Boutique can reliably transform a customer’s payment into a completed order, updating inventory and closing the loop with confirmation messages.
SpecialOrderNotificationFlow: Staff Requests
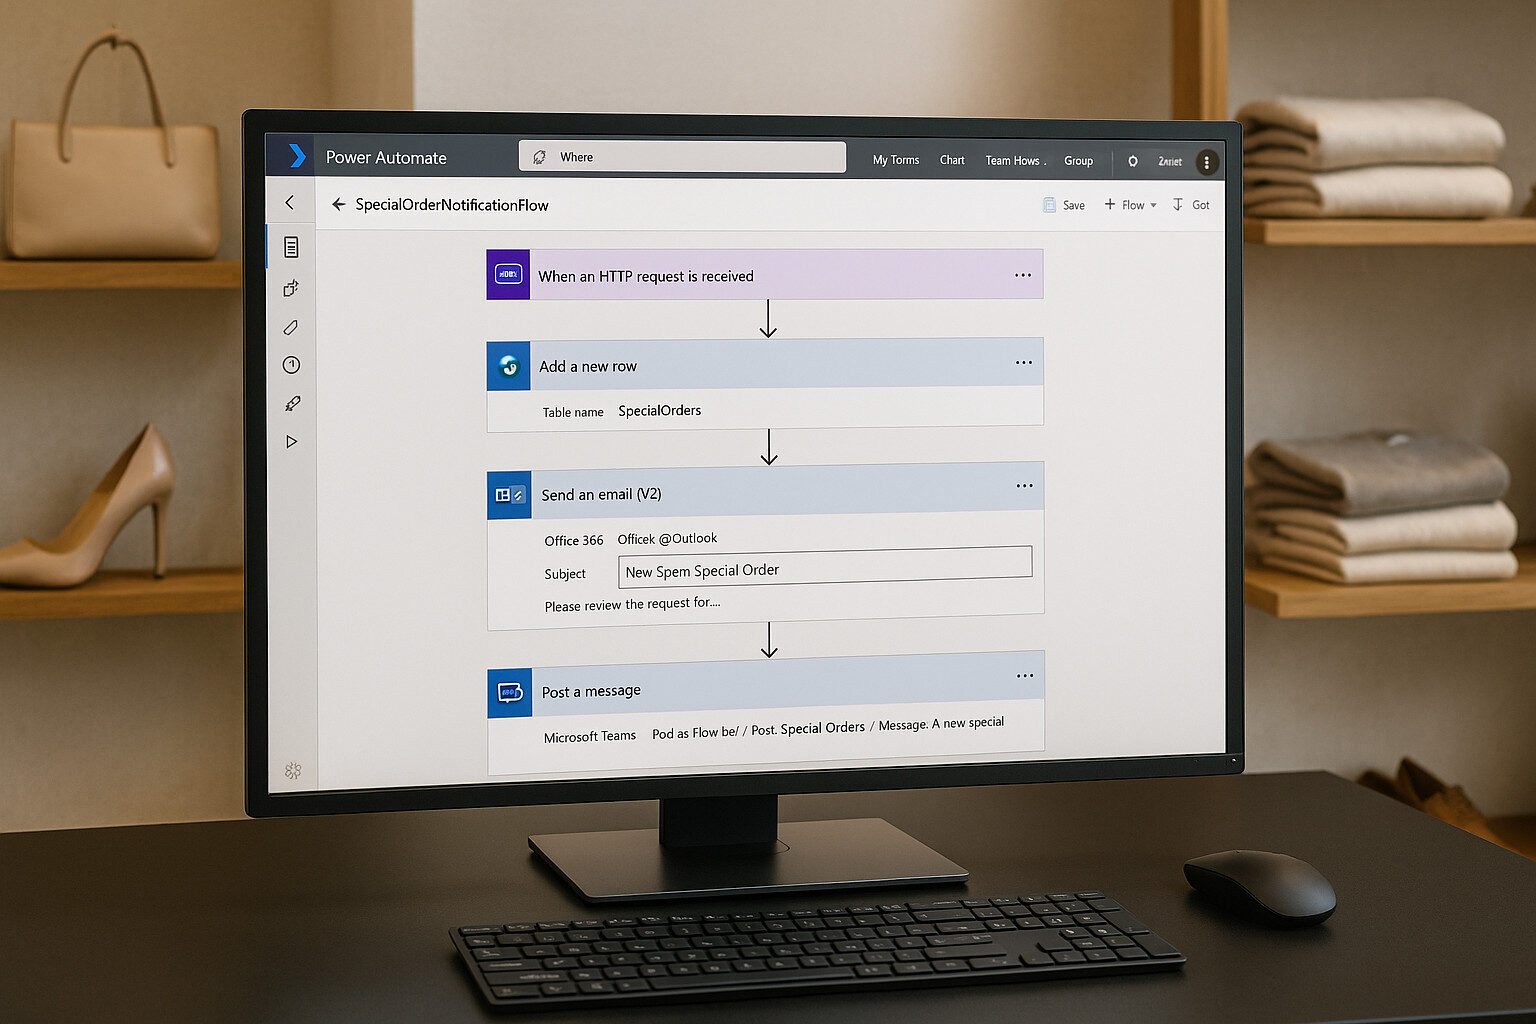 Not every order originates from a customer-facing Canvas App. When Solestyles’ shop assistants spot a demand for an out-of-catalogue item, they use the Plus → New Special Order button in the Model-Driven App to raise a special stock request. SpecialOrderNotificationFlow captures this request, notifies the buying team and logs it for tracking.
Trigger: When a HTTP Request Is Received
Depending on your design, you can:
- Use When a record is created (Dataverse) in the SpecialOrders table:
- Trigger: When an item is created in SpecialOrders
- Use When an HTTP request is received (for custom Canvas/portal triggers).
For Medium and long-term flexibility, we recommend When a record is created:
Trigger:
Connector: Dataverse
Action: When an item is created
Table: SpecialOrders
Recording the Request
Although the Model-Driven App already writes the record, you may want to enrich it:
- Scope: LogRequest
- Add a Scope named LogRequest to capture audit details.
- Get Record
- Action: Get a row by ID (Dataverse)
- Table: SpecialOrders
- Row ID: triggerOutputs()?[‘body/SpecialOrderID’]
- Update Record (optional)
- Action: Update a row (Dataverse)
- Add fields:
- RequestLoggedOn: utcNow()
- LoggedBy: triggerOutputs()?[‘body/CreatedBy’]
Notifying the Buying Team
Encapsulate notifications within a Scope named NotifyTeam:
- Send Email
- Action: Send an email (V2)
- Connection: CR_Outlook
- To: Environment variable NotificationEmail
- Subject: New Special Order Request #[SpecialOrderID]
- Body: A new special order has been requested by:
@{body('Get_a_row_by_ID')?['CreatedBy']}
    Product: @{body('Get_a_row_by_ID')?['ProductName']}
    Quantity: @{body('Get_a_row_by_ID')?['Quantity']}
    Size/Colour: @{body('Get_a_row_by_ID')?['Size']}/
@{body('Get_a_row_by_ID')?['Colour']}
Link:
[Open Request](https://make.powerapps.com/…/SpecialOrders/edit?id=@{body(‘Get_a_row_by_ID’)?[‘SpecialOrderID’]})
- Post Message to Teams
- Action: Post a message
- Connector: Microsoft Teams (CR_Teams)
- Team: Solestyles Buying Team
- Channel: Special Orders
- Message: 🔔 New special order!
Product: @{body('Get_a_row_by_ID')?['ProductName']}
Qty: @{body('Get_a_row_by_ID')?['Quantity']}
Requested by: @{body('Get_a_row_by_ID')?['CreatedBy']}
- Error Handling
- Configure run-after on NotifyTeam to catch any failures (send fallback email or log to FlowErrors).
Final Response (if HTTP Trigger)
If you used an HTTP trigger variant, conclude with a Response action:
Status Code: 200
Body:
{
"Status": "Recorded",
"SpecialOrderID": "@{body('Get_a_row_by_ID')?['SpecialOrderID']}"
}
Best Practices
- Scope Separation: Distinct scopes for logging and notification for clarity.
- Use Environment Variables: Reference NotificationEmail and Teams channel IDs via variables.
- Message Templates: Keep email and Teams messages concise with clear call-to-action links.
- Monitoring: Log any notification failures to Dataverse or Application Insights.
By implementing SpecialOrderNotificationFlow, Solestyles Boutique empowers staff to flag unique inventory needs swiftly, ensures the buying team is alerted immediately, and maintains an audit trail for each request.
With the core customer-order automation and staff-request notifications in place, it’s time to automate inventory health checks
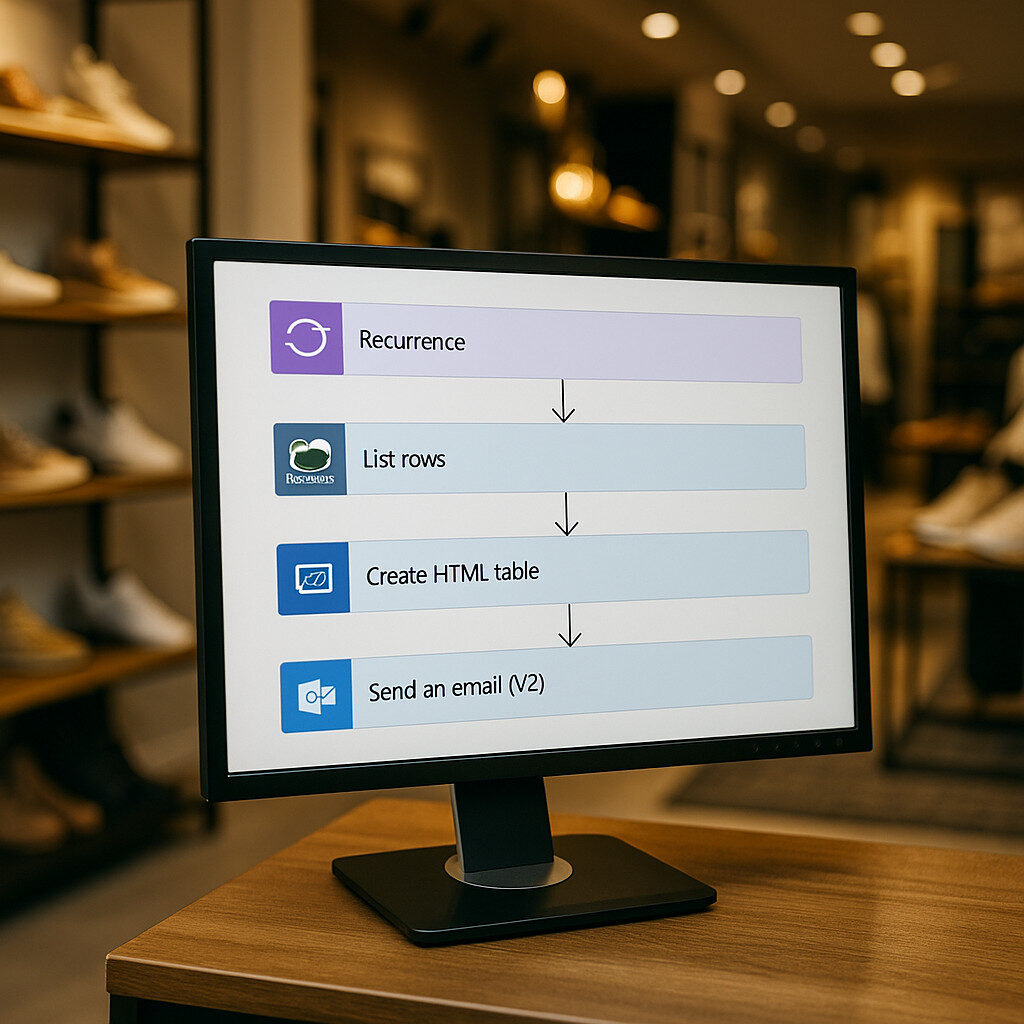
InventoryAlertFlow: Scheduled Low-Stock Reports
 Maintaining healthy stock levels is critical for Solestyles Boutique; no one wants to sell a bestseller only to discover it’s out of stock.
The InventoryAlertFlow runs on a schedule to scan for low-stock items and deliver a consolidated report to the procurement lead. Here’s how to build a reliable, solution-aware alert flow.
Configuring the Recurrence Trigger
- Add Trigger
- Action: Recurrence (built-in)
- Frequency: Daily (or Hourly for high-turn products)
- Time zone: UTC or your local zone (e.g., Europe/London)
- Start time: Pick a low-traffic hour, such as 02:00
- Enable Pagination
- In the trigger’s settings, enable Pagination on downstream List rows actions to handle hundreds of products.
Querying Low-Stock Products
- List Rows – Dataverse
- Action: List rows (Dataverse connector via CR_Dataverse)
- Table name: Products
- Filter Query:
InStock lt ReorderThreshold - Select Columns: Name, SKU, InStock, ReorderThreshold
- Top Count: Leave blank (pagination will retrieve all)
- Best Practice
- Use OData filters to delegate the query to the server.
- Confirm Pagination is enabled with a sufficiently high Threshold (e.g. 1,000).
Building the Consolidated Report
- Create HTML Table
- Action: Create HTML table
- From: output of List rows
- Columns: Custom—map fields to headers:
-
Header | Value |
Product Name | items(‘Apply_to_each’)?[‘Name’] |
SKU | items(‘Apply_to_each’)?[‘SKU’] |
Current Stock | items(‘Apply_to_each’)?[‘InStock’] |
Reorder Threshold | items(‘Apply_to_each’)?[‘ReorderThreshold’] |
Sending the Alert
- Send an Email (V2)
- Connector: Office 365 Outlook via CR_Outlook
- To: Environment variable ProcurementEmail
- Subject: “Daily Low-Stock Report for Solestyles Boutique”
- Body: Output of Compose (HTML)
- Is HTML: Yes
- Error Handling
- Wrap the List rows, Create HTML table and Send email actions in a Scope named AlertScope.
- Add an Error Handler scope with run-after on has failed to log any issues into the FlowErrors Dataverse table.
Best Practices
- Server-Side Filtering: Use OData filters to delegate to Dataverse.
- Pagination: Enable on List rows to handle large tables.
- Environment-Aware Settings: Reference ProcurementEmail and any other thresholds via environment variables.
- Clear Reporting: Use HTML tables for readability.
- Governed Automation: Place the flow in the Solestyles Boutique solution and monitor via CoE dashboards or Application Insights.
Advanced Techniques: Approvals & Adaptive Cards
 When your processes require human reviews; whether approving special discounts or vetting high-value orders; Power Automate’s Approvals connector and Adaptive Cards in Microsoft Teams offer two powerful patterns. This section shows you how to implement each approach, enabling Solestyles Boutique to orchestrate approvals seamlessly.
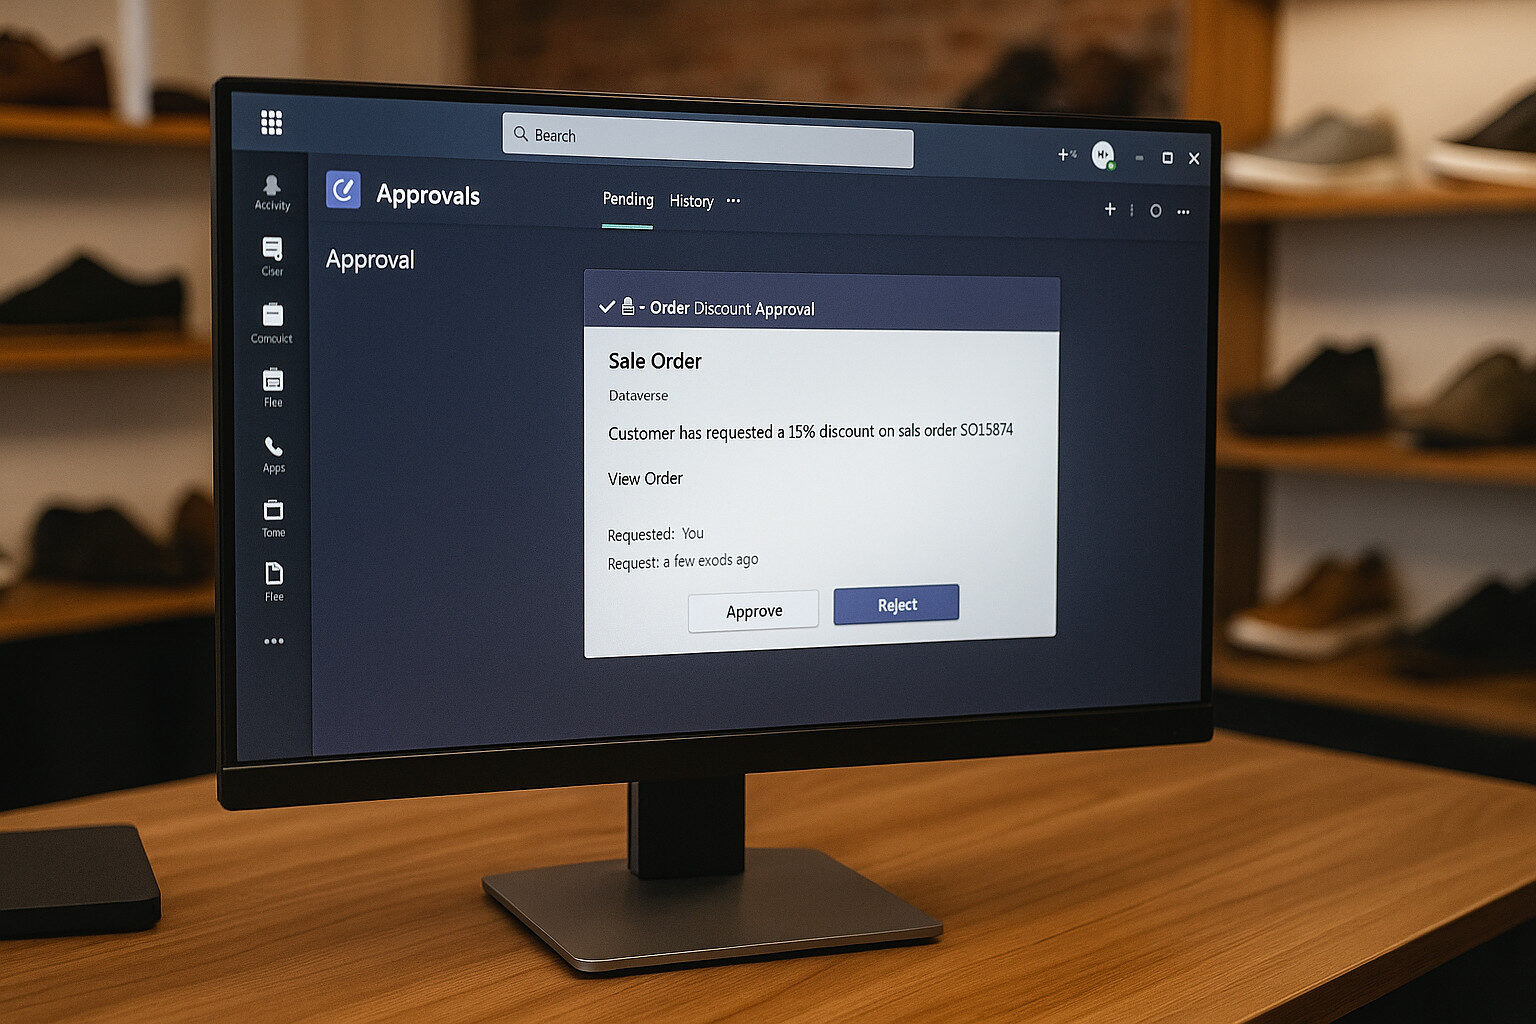
Approvals Connector: Out-of-the-Box Simplicity
The Approvals connector provides a turnkey experience for common approval scenarios:
- Add Approval Action
- In your flow, inside a Scope (e.g., ApprovalScope), choose Start and wait for an approval.
- Approval Type: Approve/Reject – First to respond (or Everyone must approve).
- Configure Details
- Title: “Order Discount Approval”
- Assigned to: Manager’s email(s) or a Teams group alias.
- Details: A customer has requested a 15% discount on Order **@{triggerBody()?[‘OrderNumber’]}**.
- Customer: @{triggerBody()?['CustomerName']}
- Total: £@{triggerBody()?['OrderTotal']}
- Item Link: Set to the Model-Driven record URL: https://make.powerapps.com/…/main.aspx?appid=…&pagetype=entityrecord&etn=orders&id=@{triggerBody()?[‘OrderID’]}
- Branch on Outcome
- Use a Condition on ApprovalResponse
(@equals(outputs('Start_and_wait_for_an_approval')?['body/outcome'],'Approve')).
- If yes, proceed to fulfilment.
- If no, update the record status to Rejected and notify the user.
The Approvals connector handles assignment, reminder emails, and a simple user interface; ideal for straightforward, low-touch workflows.
Adaptive Cards in Microsoft Teams: Richer Interactivity
For a more embedded experience, use Post adaptive card and wait for a response in Teams:
- Design the Adaptive Card JSON
- Create a JSON schema (using the Adaptive Card Designer) with fields:
- TextBlock summarising order details
- Action.Submit buttons labelled Approve and Reject, carrying data payload {“action”:”approve”}
- Post Adaptive Card
- Add the Post adaptive card and wait for a response action:
- Connection: CR_Teams
- Team: Solestyles Buying Team
- Channel: Approvals
- Message: Paste your JSON, injecting dynamic content for order number, customer and total.
- Parse Response
- The action outputs the card’s body, including action chosen and userPrincipalName.
- Branch using a Switch or Condition on body.action.
- Handle Outcomes
- Approve Path: Update the Orders table status to Approved, then call subsequent fulfilment scopes.
- Reject Path: Set status to Rejected, send a notification back to the customer.
Adaptive Cards eliminate email fatigue and keep approvals in the Teams interface where users already collaborate—improving response rates and context-awareness.
Chaining Approvals & Escalation
For multi-level approvals or time-bound steps:
- Sequential Scopes
- Place multiple Start and wait for an approval actions in sequence, each within its own scope (e.g., ManagerApproval, DirectorApproval).
- Timeouts & Escalations
- On the Approval action Settings, set a timeout (e.g., PT48H).
- Use Configure run after → has timed out to trigger an EscalationScope, which notifies a senior leader or logs the overdue item.
Best Practices
- Use the Simplest Pattern: Start with the Approvals connector; switch to Adaptive Cards only when you need richer UI or additional context.
- Template Your Cards: Store adaptive card JSON as solution web resources or environment variables for easy updates.
- Consistent Naming: Prefix approval scopes/actions with Approv_ to streamline run-history diagnostics.
- Notification Feedback: Always send an email or Teams message confirming the final decision to relevant stakeholders.
- Governance: Monitor pending approvals via the Power Platform Admin Center or CoE dashboards.
By leveraging both the Approvals connector and adaptive cards, Solestyles Boutique can craft approval flows that balance simplicity with interactivity ensuring timely decisions, clear audit trails and a frictionless user experience.
Integrating HTTP & Custom Connectors
 When Solestyles Boutique must reach beyond Dataverse and Office 365; calling payment gateways, shipping APIs or other partner services; Power Automate’s HTTP connectors and Custom Connectors provide secure, reusable integration points. In early 2024, Microsoft renamed and enhanced these connectors: the former “HTTP with Azure AD” is now HTTP with Microsoft Entra ID (standard and pre-authorized variants), and a first-party “HTTP” connector supports generic calls. Let’s explore both patterns using the very latest guidance.
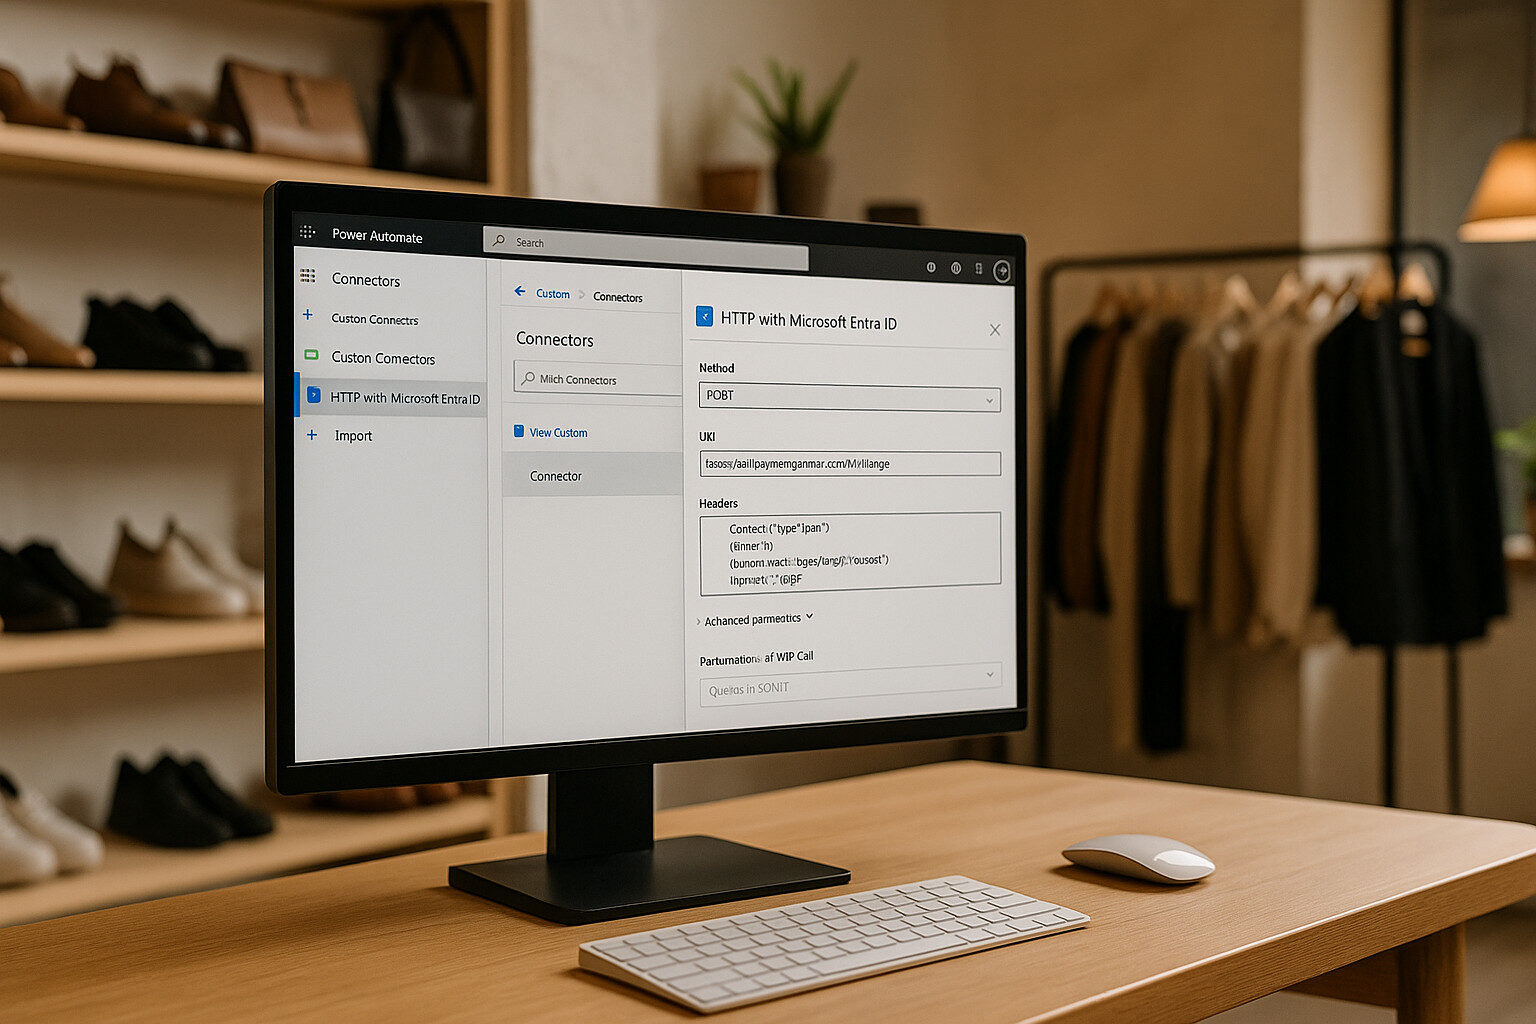
Calling APIs with HTTP with Microsoft Entra ID
The HTTP with Microsoft Entra ID (preauthorized) connector is effectively the successor to “HTTP with Azure AD,” pre-wired to use Microsoft’s trusted app for delegated calls to Graph, Dataverse and other Entra-protected services learn.microsoft.com.
Choosing the Right Connector Variant
- Standard: Requires you to register your own Entra ID application (client ID/secret) and grant scopes.
- Preauthorized: Uses Microsoft’s built-in app; no registration needed, but DLP policies may forbid it by default.
Use DLP to block or allow preauthorized connectors according to your governance requirements.
Making a Secure HTTP Call
Inside your flow, add:
Action: HTTP with Microsoft Entra ID
Connector: HTTP with Microsoft Entra ID (preauthorized)
Method: POST
URI: https://api.paymentpartner.com/v1/charge
Headers:
Content-Type: application/json
Body:
{
"customerId": "@{triggerBody()?['UserID']}",
"amount": @{sum(triggerBody()?['CartItems'],
'Quantity' * items()?['UnitPrice'])},
"currency": "GBP"
}
The connector handles token acquisition and renewal on your behalf. If you need tighter isolation, switch to the standard variant and supply your own App registration.
Building and Using Custom Connectors
For a richer, strongly typed authoring experience and to enforce policies at the connector level, create a Custom Connector backed by an OpenAPI definition and secured with Entra ID.
Prepare Your OpenAPI Specification
Draft a minimal swagger.json or openapi.yaml describing your partner API:
openapi: 3.0.1
info:
title: Shipping Partner API
version: 1.0.0
paths:
/v1/track:
post:
summary: Track a shipment
requestBody:
content:
application/json:
schema:
$ref: '#/components/schemas/TrackRequest'
responses:
'200':
description: OK
content:
application/json:
schema:
$ref: '#/components/schemas/TrackResponse'
components:
schemas:
TrackRequest:
type: object
properties:
orderId: { type: string }
zipCode: { type: string }
required: [orderId, zipCode]
TrackResponse:
type: object
properties:
status: { type: string }
eta: { type: string }
Import into Your Solution
- In Solestyles Boutique solution, click New → Connector → Import > OpenAPI.
- Upload your spec and choose Security → OAuth 2.0 with your Entra ID App (client ID/secret).
- Define the Redirect URL as https://global.consent.azure-apim.net/redirect and grant the user_impersonation scope.
- Test each operation and Publish.
Consume in Flows
Your connector now appears alongside built-in actions:
Action: Shipping Partner – Track shipment
Parameters: orderId: @{body('Create_Order')?['orderid']}
zipCode: @{body('Get_Order')?['ShippingPostalCode']}
IntelliSense shows request and response schemas, reducing runtime errors.
Best Practices
- Environment Variables for Endpoints Store base URIs in an env_ShippingAPIURL variable to switch Test/Prod seamlessly.
- DLP Controls Use Data Loss Prevention policies to block preauthorized connectors if required.
- Retry & Throttle Policies For custom connectors, configure retry-after rules in the Policy tab to handle HTTP 429 responses.
- Version Your Connectors Bump connector version for breaking schema changes (e.g. 1.0.0 → 1.1.0) and update flows accordingly.
By adopting HTTP with Microsoft Entra ID for quick, delegated calls and Custom Connectors for full-blown API integration, Solestyles Boutique extends its automation fabric securely, powerfully and in line with Microsoft’s latest recommendations.
Testing, Monitoring & Troubleshooting Flows
 Even the best designed flows can encounter errors in production. Rigorous testing and proactive monitoring turn failures into opportunities for improvement and ensure that Solestyles Boutique’s automations remain reliable and transparent. In this section, I explore the latest Power Automate tools and patterns for testing, diagnosing and optimising your flows.
Testing in the Test Pane
Power Automate’s Test pane offers two up-to-date testing modes: manual triggers and static result testing.
- Manual Testing
- Click Test and select Manually.
- Perform the triggering action (send the test HTTP request or create a Dataverse record).
- Watch each action execute in real time, inspecting inputs and outputs.
- Using Previous Runs
- Choose Use data from previous runs to re-execute a flow without re-generating triggers.
- Ideal for iterative debugging when the trigger action is difficult to reproduce.
- Static Result Testing
- Mock long-running or external actions by supplying Static Results (mock data).
- Bypass real HTTP calls or connector actions to focus on downstream logic, dramatically reducing test time.
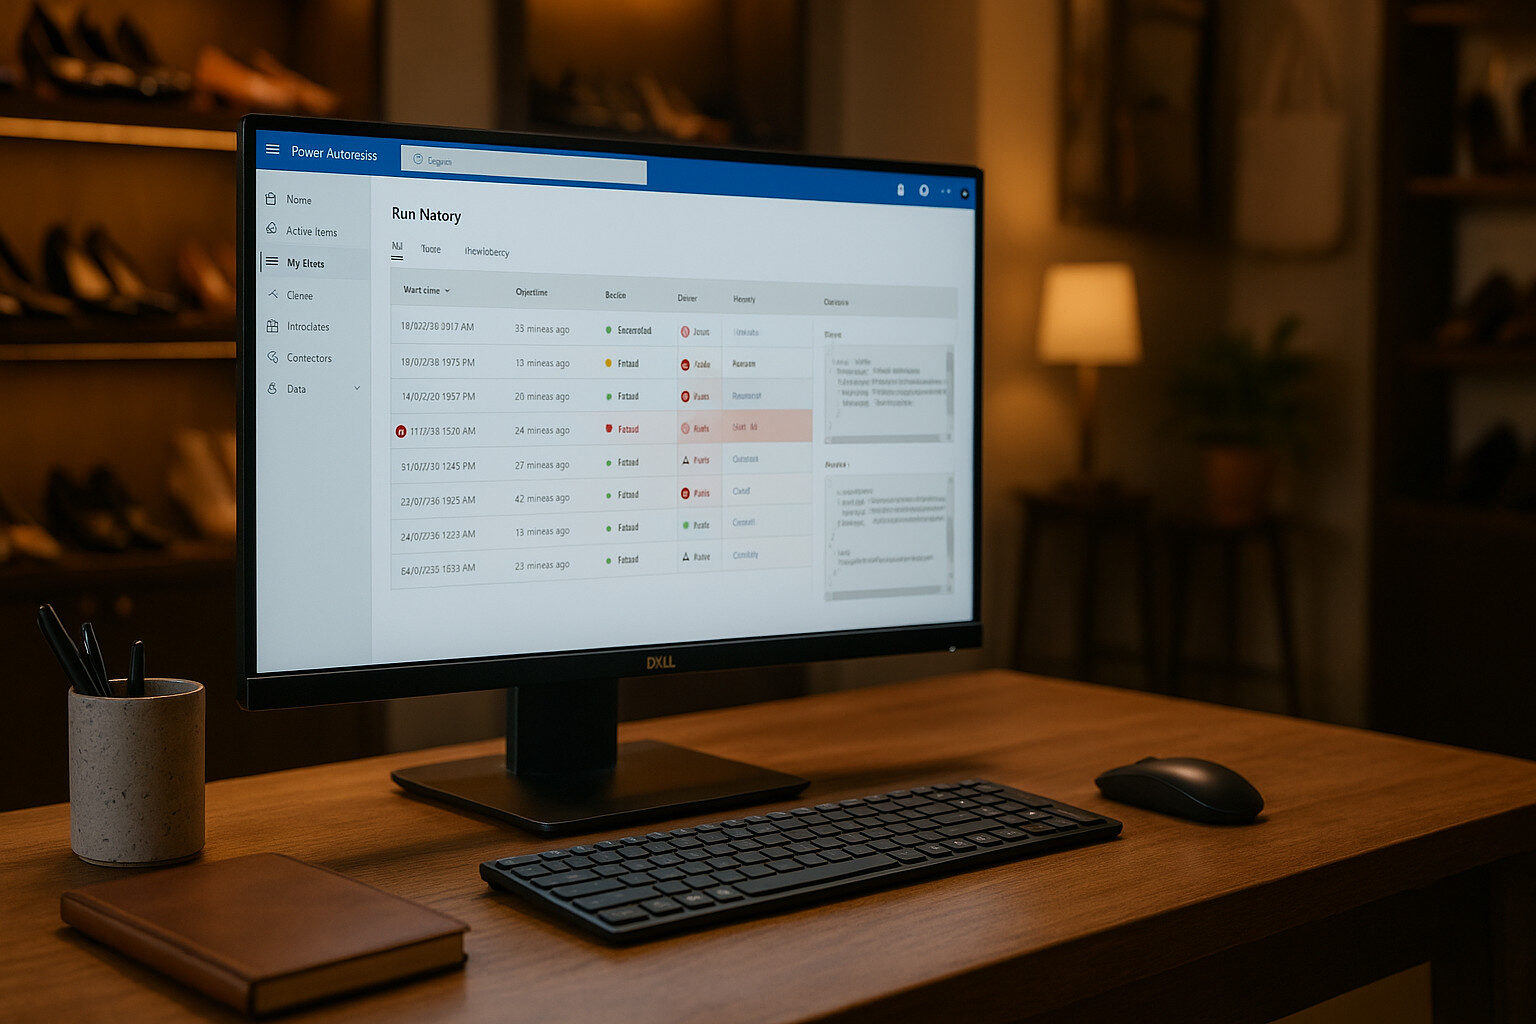
Reviewing Run History
Every flow execution is captured in the Run History (retained for 28 days by default).
- Accessing Run History
- Navigate to My flows → select your flow → scroll to 28-day run history.
- Inspecting a Failed Run
- Click the timestamp of the failed instance.
- Steps with errors display a red exclamation icon; click to view detailed error messages and code snippets.
- Exporting Logs
- Use the Download as CSV feature to archive run details beyond 28 days or to integrate with external reporting tools.
Flow Checker & Anti-Pattern Detection
The Flow Checker flags design-time errors and warnings before your flow runs.
- Accessing Flow Checker
- In the designer, click the … menu and select Flow Checker.
- Common Issues Identified
- Missing required fields in actions.
- Deprecated connector usage.
- Expressions that may fail at runtime.
- Resolving Warnings
- Follow the inline guidance to update connectors, adjust expressions or split monolithic scopes.
Integrating Application Insights
For enterprise-grade telemetry, connect your flows to Azure Application Insights.
- Enable Diagnostics
- In the Power Platform Admin Center, under Environments → Settings → Monitoring, enable Application Insights for your environment.
- Inject Custom Events
- Use the Track Event action in your flows to log custom telemetry (e.g., FlowName, OrderID, Duration).
- Dashboards & Alerts
- In the Application Insights portal, create charts for failure rates, average execution times and service exceptions.
- Configure Smart Detection alerts to notify the team when thresholds are breached.
Troubleshooting Common Issues
- Trigger Failures:
- Consult “Troubleshoot common issues with triggers” guide to address misconfigured connectors or permission errors.
- Retention Limits:
- If you need history beyond 28 days, set up automatic export of run data or archive logs in Dataverse via a scheduled flow.
- Concurrency & Throttling:
- Monitor connector limits; use run concurrency settings on Triggers to cap parallel runs and avoid throttling.
Best Practices for Reliable Flows
- Keep Flows Modular
- Cap each flow at fewer than 50 actions and offload sub-processes to child flows for easier testing and reuse.
- Consistent Naming
- Prefix scopes and actions with Init_, Main_, Error_ to make run logs self-documenting.
- Versioning & Documentation
- Document each flow’s purpose, trigger and key actions in the solution’s description fields.
- Automated Regression Tests
- Consider using the Power Platform CLI’s test harness or community tools to run smoke tests on flows after deployments.
ALM & Governance for Flows
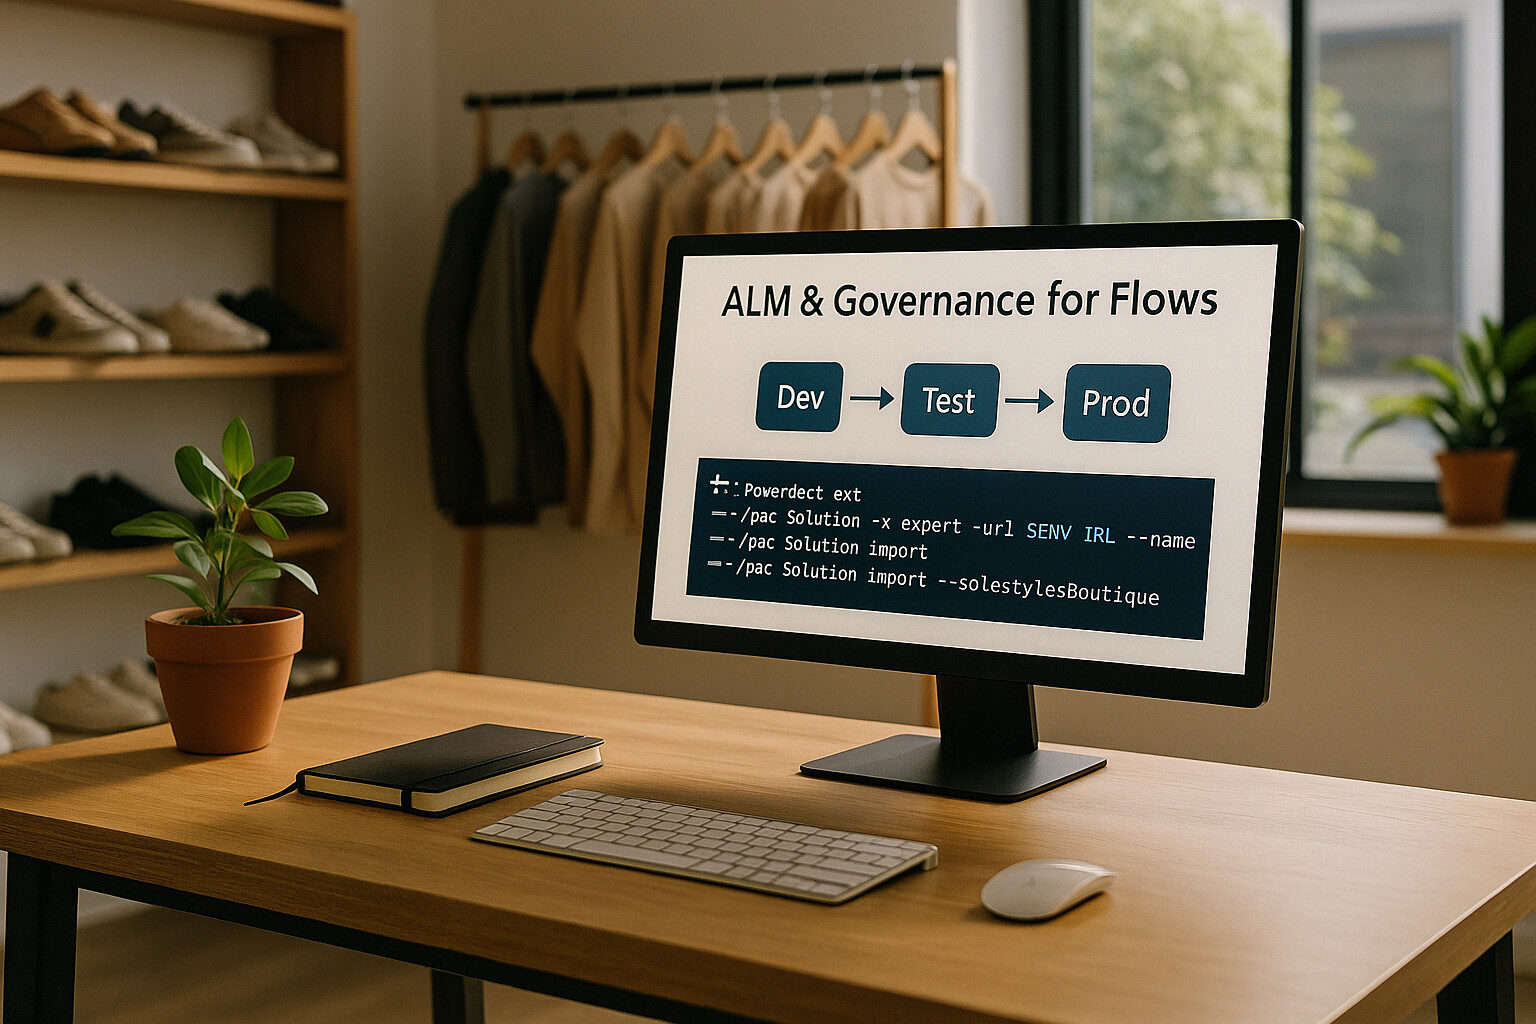 Just as your Canvas and Model-Driven apps live in a single solution, your flows too must travel together under a governed lifecycle. In this final section, I cover how to package your Power Automate flows for Dev→Test→Prod deployments, enforce organisational policies and integrate flow management into your CI/CD pipeline.
Packaging Flows in Managed Solutions
- Develop in Unmanaged
- Build and iterate on your flows within the Solestyles Boutique solution in your Dev environment.
- Export as Managed
- In Test or Production, import the solution as “Managed” to prevent ad-hoc edits.
- Navigate to Solutions → Solestyles Boutique → Export → Managed.
- Version Numbering
- Update the solution version (e.g. 1.3.0.0 → 1.4.0.0) before export.
- Document changes in the release notes (flow additions, patch fixes).
This approach ensures that flows, apps and connectors stay in lock-step across environments, eliminating “it works on my tenant” surprises.
Automating Deployments with Power Platform CLI
Integrate your flows into a CI/CD pipeline using the Power Platform CLI (pac) and Azure DevOps or GitHub Actions:
# Authenticate
pac auth create --url $ENV_URL --name solestyles --tenant $TENANT_ID --clientId $CLIENT_ID --clientSecret $CLIENT_SECRET
# Export solution
pac solution export --path "./solutions" --name "SolestylesBoutique" --publisherPrefix sol --managed
# Import into target environment
pac solution import --path "./solutions/SolestylesBoutique_managed.zip" --environment $TARGET_ENV
- CI Pipeline: Run pac solution export on every commit to main.
- CD Pipeline: Trigger import into Test on pull-request approval; into Production on merge-to-release branch.
Enforcing DLP & Tenant Policies
Data Loss Prevention (DLP) policies safeguard your connectors and flows:
- Power Platform Admin Center
- Go to Environments → [YourEnv] → Data policies.
- Create or Update Policy
- Define Business vs Non-Business connector groups.
- Block preauthorized connectors if needed (e.g. HTTP with Microsoft Entra ID).
- Assign to Environments
- Apply DLP policy to Dev/Test/Prod to prevent non-compliant flows from running.
Centre of Excellence (CoE) Integration
Leverage Microsoft’s CoE Starter Kit to monitor and govern your automation estate:
- Flow Inventory: Automatically harvest metadata on every flow.
- Maker Dashboard: Track active makers, flow runs and ownership.
- Policy Remediations: Surface flows using blocked connectors or exceeding runtime quotas.
The CoE Starter Kit lives as its own solution in your tenant and can be extended to enforce custom rules (e.g. naming conventions flow_OrderProcessingFlow).
Monitoring & Lifecycle Management
- Solution Checker for Flows
- In the solution’s command bar, click Solution Checker to validate flow recommendations (best practices, deprecated actions).
- Scheduled Reviews
- Establish a quarterly flow–audit: review run-history volumes, failure rates and connector usage.
- Retirement & Cleanup
- Use CoE’s unused flow report to identify and archive flows not triggered in the last 90 days.
- Remove associated connection references and environment variables to declutter the solution.
Best Practices Recap
- Single Solution, All Components: Bundle Canvas, Model-Driven, Pages and all flows together.
- Managed Exports: Always import as managed in non-Dev environments.
- Automated CI/CD: Use pac CLI scripts in DevOps pipelines.
- DLP Compliance: Guard connectors with tenant-wide policies.
- Governance via CoE: Monitor adoption, enforce naming and lifecycle rules.
By embedding your flows within a disciplined ALM process, and leveraging DLP and CoE governance, Solestyles Boutique ensures that automation remains robust, compliant and maintainable—now and as the business grows.
Conclusion & Next Steps
 We’ve now journeyed through the full spectrum of Power Automate for Solestyles Boutique; from establishing solution aware flows, through resilient error handling and core automations, to advanced approval patterns and external integrations. These automations seamlessly link your Canvas and Model-Driven apps to form a cohesive, low-code platform that powers day-to-day operations, elevates customer experiences and frees your team to focus on strategic growth.
Key Takeaways
- Integrated ALM: All flows live in the single Solestyles Boutique solution, ensuring predictable deployments and version control.
- Resilience by Design: Scoped logic, robust retry mechanisms and error logging guarantee that transient failures never go unnoticed.
- End-to-End Automation: From payment processing to special-order notifications and low-stock alerts, flows automate every critical business process.
- Advanced Scenarios: Approvals via connector or Adaptive Card, secure HTTP calls with Microsoft Entra ID, and custom connectors extend your reach to any external system.
- Governance & Monitoring: CI/CD pipelines with the Power Platform CLI, DLP policies and CoE–driven insights maintain security and compliance.
Next in the Series: Power BI Analytics Deep Dive
In Post 5, I’ll unlock the power of Power BI, designing reports and dashboards that transform Solestyles’ operational data into strategic intelligence. You’ll learn how to:
- Connect to Dataverse and Canvas App collections
- Build calculated measures (e.g., stock turnover, sales velocity)
- Design visually compelling reports with slicers, bookmarks and drill-throughs
- Implement incremental refresh and performance best practices
Thank you for joining this deep dive into Power Automate. As always, your feedback, questions and real-world experiences are welcome.
If you have any questions or want to share your own best practices, please drop a comment below. See you in the next post!